
Six Months Later... So Many Cakes!
June 15, 2015

Long time no blog! I can't believe it's been six months since my last post, and I have so much to share! The last few months have been a little crazy for me... trying to balance a 9-5, my son's school schedule, a very active toddler, and my baking addiction has pulled me away from updating my blog. Don't fret! I have plenty to share, and I apologize ahead for this lengthy post. The last few cakes I made were for my friends, and friends of family. They were fun to design, a pleasure to bake, but most of all, it was exciting to try out new techniques and ideas.
 This was my first drum cake, and I used a photo of Jesael's drum set as reference. I stacked two 8 inch rounds and covered it in white fondant. I then wrapped a long strip around the side of the cake, making sure it was 1/8 inch taller to create the rim. I dusted the top center of the cake with ivory petal dust to mimic the wear of the real drum. To make it more realistic, I used a paper towel and wiped away some luster dust in long straight strokes to mimic the dragging of a drum stick. I then combined several shades of brown into a swirled pattern, and shaped the drumsticks. This made them look like real warm-colored wood. I finished off the cake with silver accents such as the oval lugs, rims, name plate, and the tension rods were lollipop sticks covered in luster dust. This looked so good that some of the guest tried to play it when it was on the table!
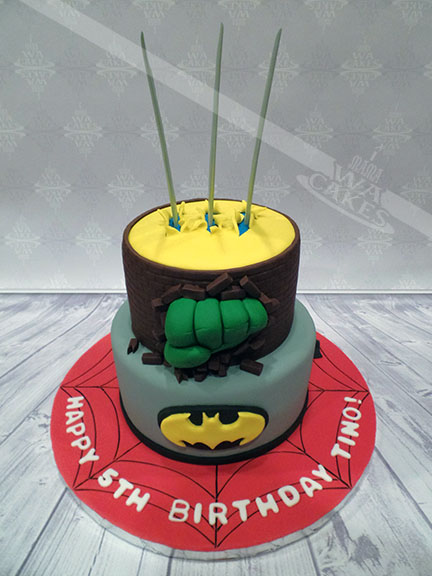
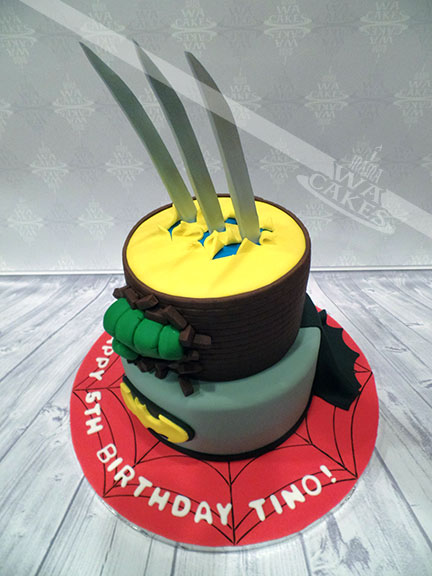 I have made plenty of super hero cakes in the past, but none of them were quite like this. This cake contained several multi-dimensional work. I had to think about my base/background, and what would work in the foreground. On top of that, I had to combine elements of 4 different characters in a cohesive design. After a few sketches, I decided on Spider-man's web as the base. I covered the cake drum in red fondant, and drew on the web with a black edible marker. The web created the perfect foundation for rest of the cake... it appears as though the cake is supported by the web. Next tier was all about Batman. I covered the cake in the classic gray with a free-flowing black cape hanging off the back. The recognizable Bat logo was given depth with a black oval and the yellow bat overlay. The next tier was my fave to create. I textured the side to mimic a brick wall, and shaped Hulk's fist out of a thick, flattened green oval. I cut slits into it to mimic the fingers, and rolled them in as if making a fist. I then used a veining tool and created the creases around the knuckles. Individual brick pieces were then cut and attached around the fist to simulate Hulk breaking through the wall. The very top of the cake was covered with a bright blue and then a layer of yellow. I made several small cuts into the yellow layer only and folded it back to look like shredded fabric. The signature Wolverine claws were shaped out of gumpaste, and left to dry a week prior to baking this cake. Using an air brush, I covered the claws in a edible metallic silver sheen, and created darker shadows with a slate blue. These were then inserted into the cake in the three areas once the color had dried. Doesn't it look like Wolverine clawing his way out?!
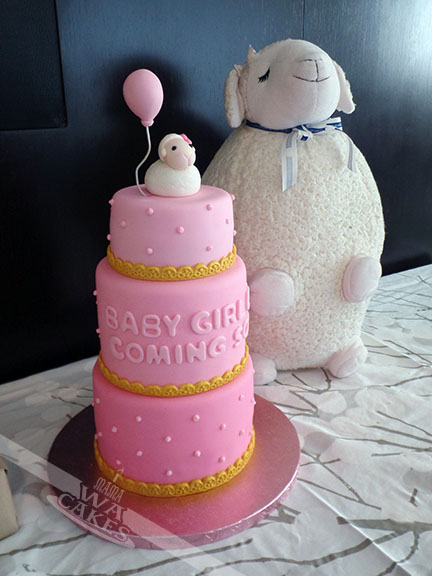
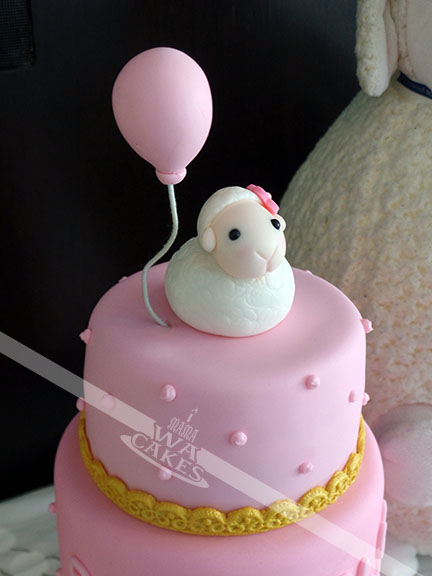 There is nothing cuter in this world than a baby lamb cake. Except for a pink ombre, baby lamb cake! The gradation of colors gave this simple and chic cake depth, and leads your eyes up the tall cake to where the little guy sits. I mixed three different shades of pink, covering the bottom cake in the darkest, and the lightest on top. All three cakes were stacked to created an overall height of 12 inches. Each cake was then accented with molded fondant lace that I covered with gold luster dust. With same medium shade, I cut out the message for the second tier to not break up the ombre effect. I then piped little swiss dots on the rest of the cake. The cake was so pretty, but no baby shower cake can be complete without an extra dose of cuteness. The star of cake was the fondant lamb and gumpaste balloon topper... this has got to the most adorable thing I've made so far! She was shaped out of two balls of fondant... the body was an oval and the head was more of a teardrop. For the fleece, I used a large round tip and made overlapping impressions all over the body. This method was simple and very effective. I used the same method for the small cap of fleece on her head, and accented it with a small pink flower. The ears were small teardrops of fondant, while the eyes were small black sugar pearls. I used a veining tool for her nose and mouth, and completed the look with a touch of pink luster dust for some rosiness. What do you think?!

Drum Cake For Jesael
Super Hero Mash-Up
I have made plenty of super hero cakes in the past, but none of them were quite like this. This cake contained several multi-dimensional work. I had to think about my base/background, and what would work in the foreground. On top of that, I had to combine elements of 4 different characters in a cohesive design. After a few sketches, I decided on Spider-man's web as the base. I covered the cake drum in red fondant, and drew on the web with a black edible marker. The web created the perfect foundation for rest of the cake... it appears as though the cake is supported by the web. Next tier was all about Batman. I covered the cake in the classic gray with a free-flowing black cape hanging off the back. The recognizable Bat logo was given depth with a black oval and the yellow bat overlay. The next tier was my fave to create. I textured the side to mimic a brick wall, and shaped Hulk's fist out of a thick, flattened green oval. I cut slits into it to mimic the fingers, and rolled them in as if making a fist. I then used a veining tool and created the creases around the knuckles. Individual brick pieces were then cut and attached around the fist to simulate Hulk breaking through the wall. The very top of the cake was covered with a bright blue and then a layer of yellow. I made several small cuts into the yellow layer only and folded it back to look like shredded fabric. The signature Wolverine claws were shaped out of gumpaste, and left to dry a week prior to baking this cake. Using an air brush, I covered the claws in a edible metallic silver sheen, and created darker shadows with a slate blue. These were then inserted into the cake in the three areas once the color had dried. Doesn't it look like Wolverine clawing his way out?!
Sweet Lamb Cake
There is nothing cuter in this world than a baby lamb cake. Except for a pink ombre, baby lamb cake! The gradation of colors gave this simple and chic cake depth, and leads your eyes up the tall cake to where the little guy sits. I mixed three different shades of pink, covering the bottom cake in the darkest, and the lightest on top. All three cakes were stacked to created an overall height of 12 inches. Each cake was then accented with molded fondant lace that I covered with gold luster dust. With same medium shade, I cut out the message for the second tier to not break up the ombre effect. I then piped little swiss dots on the rest of the cake. The cake was so pretty, but no baby shower cake can be complete without an extra dose of cuteness. The star of cake was the fondant lamb and gumpaste balloon topper... this has got to the most adorable thing I've made so far! She was shaped out of two balls of fondant... the body was an oval and the head was more of a teardrop. For the fleece, I used a large round tip and made overlapping impressions all over the body. This method was simple and very effective. I used the same method for the small cap of fleece on her head, and accented it with a small pink flower. The ears were small teardrops of fondant, while the eyes were small black sugar pearls. I used a veining tool for her nose and mouth, and completed the look with a touch of pink luster dust for some rosiness. What do you think?!
Iron Man Arc Reactor Cake
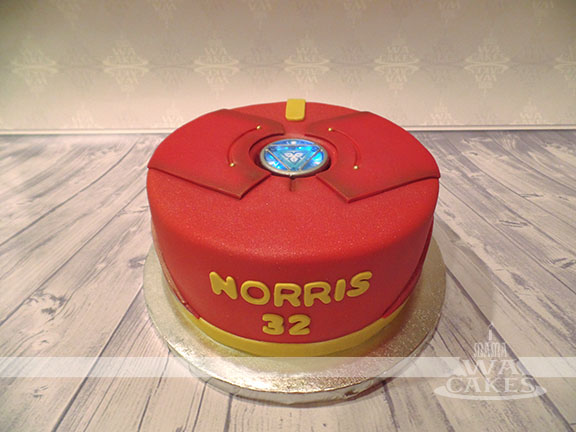
This cake was made for my awesome hairstylist, Norris. He has been perfecting my son's hair and of myself for the past 3 years, and when he mentioned his birthday... I couldn't help myself :) He mentioned a few times that he liked Iron Man so I thought that was a good place to start. He didn't want anything too complicated or too big, but I didn't want to give him anything too boring. I narrowed it down to making a cake based on the Arc Reactor in his chest... again, nothing boring. I then turned to the internet to hunt down the wow factor, something I could use as the light in his chest. I almost gave up when every thing I found was too big for my purpose or just required lots of mechanical work. Then I stumbled across a listing... a Arc Reactor USB flash drive with LED lights! It was perfect and all I had to do was to created an indent on top of the cake for it to sit in. I baked a two layer 8 inch cake, and covered it with red fondant. Using images I found online, I created a template for the chest details, and some detailing from the sides of his torso. I added on yellow fondant accents that I brushed with gold luster dust for a nice sheen. Once all the details were attached, I went back and airbrushed the edges with some copper to give some depth, and the overall cake with a nice metallic sheen. The final touch was the LED flash drive that I tightly in plastic wrap. All I had to do was turn it on, and the light show began! You can check it out below!
Thanks everyone for checking out this lengthy post, and I know I might have left out some details... please feel free to ask questions if you want to know how I did something. I hope you enjoyed these!
Disney Frozen Elsa Princess Cake
December 1, 2014
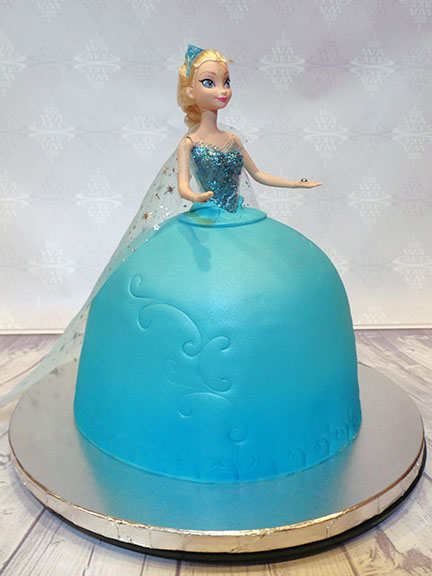
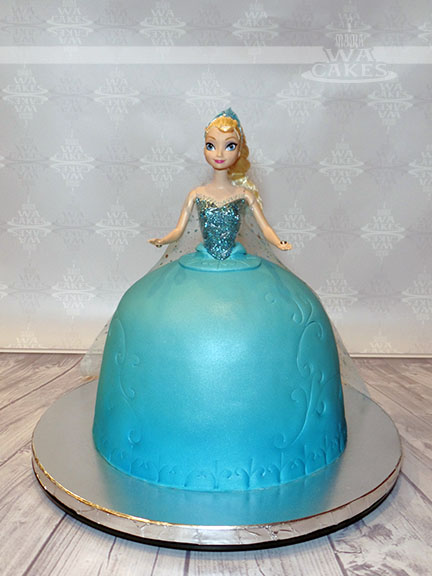
This following cake was a first for me... I've never had the opportunity to make a princess dress cake for anyone before. What better than make my first one as Elsa from Disney's Frozen! The first step was to figure out how tall the doll was and how big the cake would have to be to feed the expected number of guests. After much research, I came across the Disney Frozen Musical Magic Elsa doll. She was the perfect height for an 7" in tall cake.

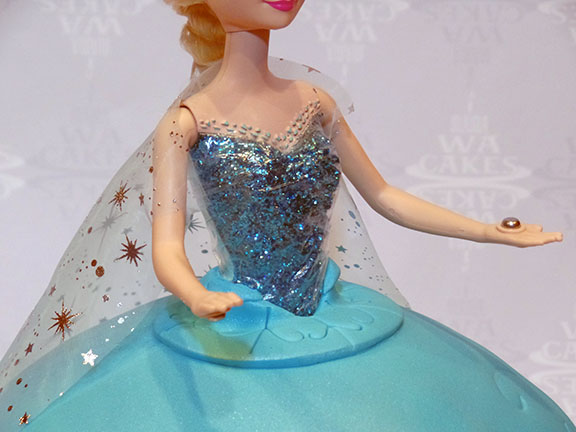
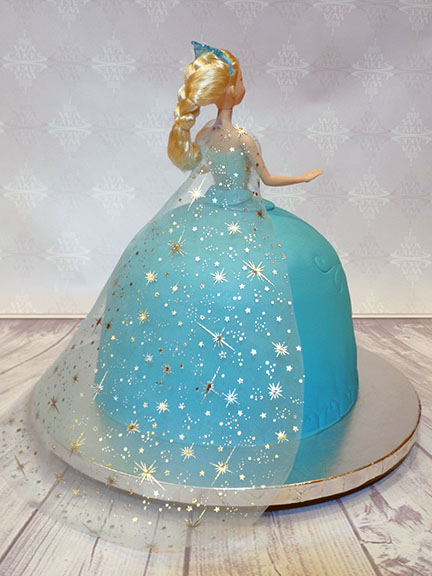
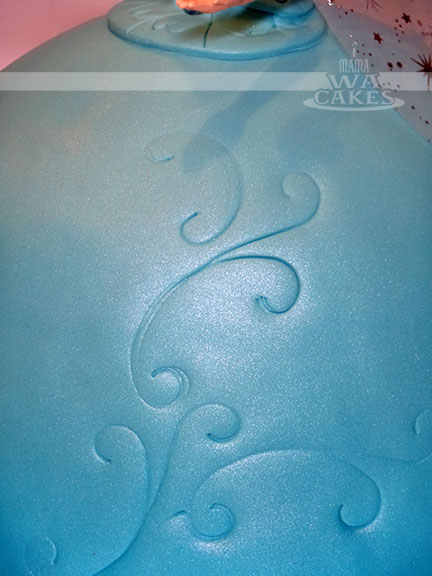 Elsa was then carefully placed into the cake, and I finished off the opening. I then stamped the cake with various Wilton decoration stencils to create a swirled motif along the bottom, and flowing up the sides. Be careful when doing this to not break through the fondant. Since Elsa's dress has an icy gradation, I air brushed the entire dress area in a pearl sheen, and blending in a darker blue sheen towards the bottom of her dress. For her cape, I opted for a printed mesh fabric that matched perfectly, color and motif. I made sure the sparkles were not simply glued on... Who wants glitter all over there cake?! oh, and I washed it prior to cutting out the desired shape. I simply cut two arm holes near the tapered top and slipped her arms through it. The finished look was perfect!
Did I mention she lights up?!!! You can view the cake in action here!
Cute Piggy Cake
October 29, 2014
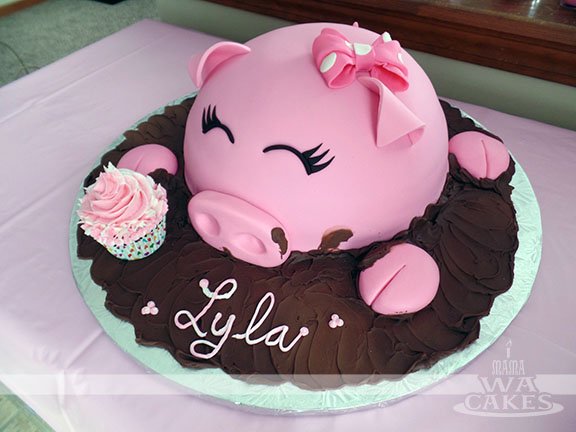
Last month, I had the pleasure of creating an adorable cake for my sister's friend... It was her little girl's 1st birthday! When she told me what she wanted, I was excited and quickly began brain storming.
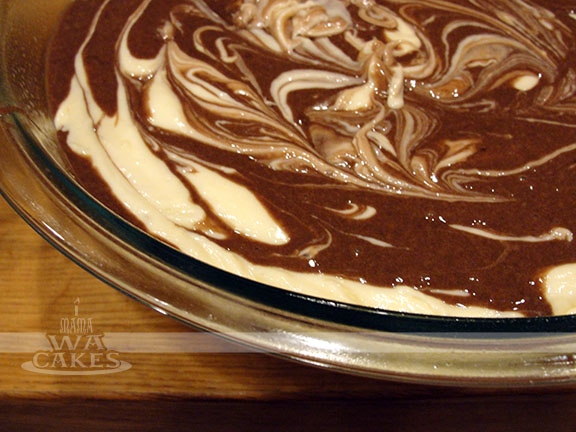

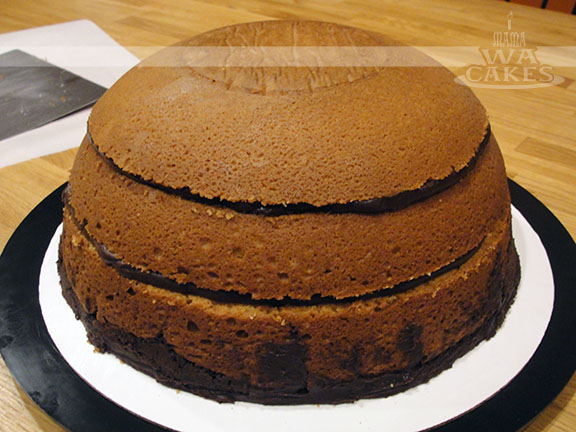
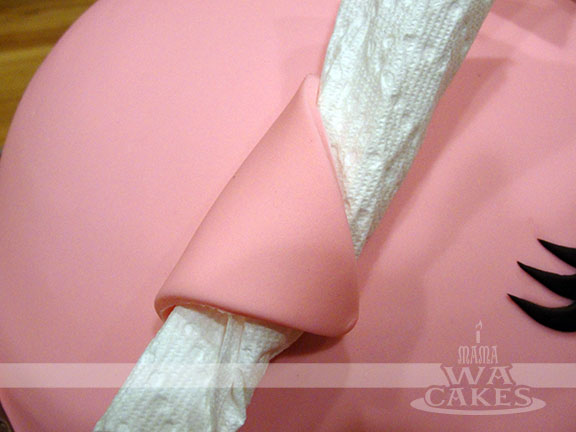
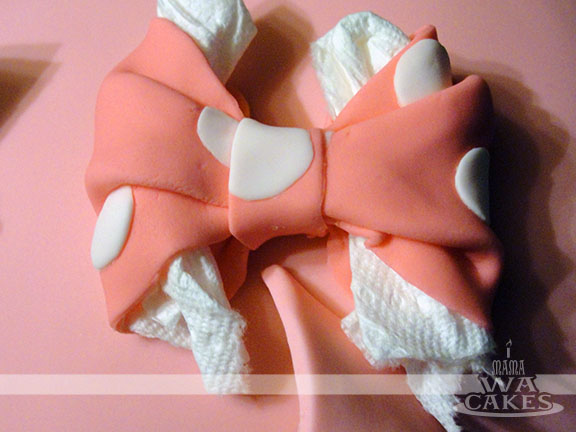
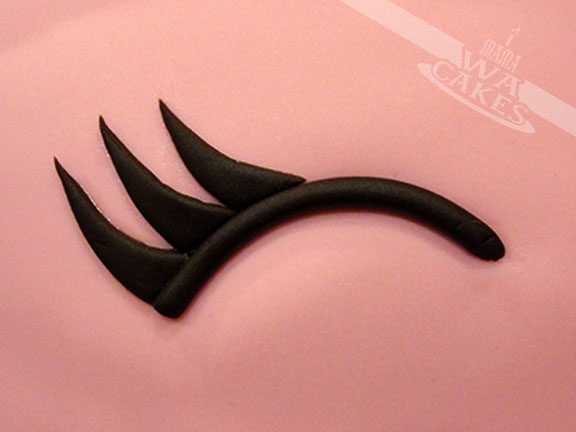
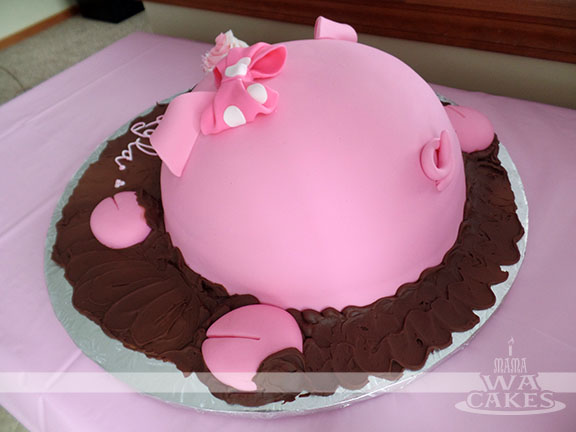
After the cake is baked and cooled completely, I leveled and torted the cake into 3 layers. To level a cake like this, the easiest way is to run a knife long the top of the bowl and keeping it straight until cut completely through. The layers were then filled with strawberry preserve, and crumb coated with buttercream. A blanket of pink fondant was then draped over the cake, and smoothed out by hand. For the distinct piggy nose, I created a large rectangle with rounded corners and indented the nostrils with a large ball tool. I then attached it to the cake with the help of some piping gel. I prefer to use piping gel or royal icing for large pieces like this, instead of water, for the holding power. The same goes for the piggy feet that I simply shaped out of balls of pink fondant.


Snowskin Mooncake Recipe and Tutorial (冰皮月饼)
August 29, 2014
|
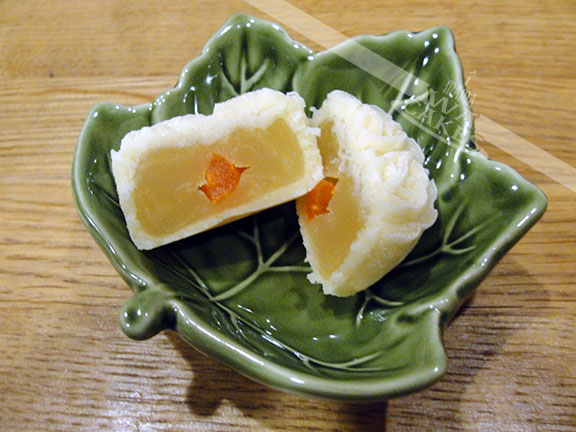
| Mango with mung bean paste and dried mango center |
With the Chinese Mid-Autumn Festival right around the corner, I wanted to share this tutorial on how to make your own Snowskin Mooncakes. Ever since I moved into my own home, I made it a priority to buy mooncakes for my family, but they can be pricey. Last year, I decided to try making these after finding recipes online. I then tweaked it to my preference for a softer and smoother skin, with less sweetness. Usually the fillings are sweet enough without adding more to the skin. These are not baked like the traditional kind, and are tons of fun to make. They are easy to make if you can find the right ingredients, but can be time consuming. The hardest part is to find the Kou Fen, fried glutinous rice four. If this ingredient is not readily available, you can make your own and the instructions are below. Oh! and measure everything on a kitchen scale... every gram makes a difference!
Things you will need:
Mooncake mold ( Jello molds are a good substitute )
Kitchen Scale
90g fried glutinous rice flour (Kou Fen)
10g wheat starch (Tang Mien Fen) (This can be left out if someone is allergic to wheat, just add 10g to the rice flour needed)
30g shortening
30g powder sugar
130g water, juice, tea, coffee, or any other flavoring liquid coloring (optional)
30g shortening
30g powder sugar
130g water, juice, tea, coffee, or any other flavoring liquid coloring (optional)
Paste of your choice for filling, such as lotus seed, red bean, taro, sesame, or chestnut.
Extra fried glutinous rice flour for dusting.
1. Sift together the glutinous rice flour, wheat starch and icing sugar together. Use a soon to break up clumps.
2. Rub the shortening into the flour mixture until it is a crumbly texture.
3. Combine water or liquid
(with coloring, if using), and add to the flour. Mix until a soft dough
forms and that all dry and wet ingredients are uniformly mixed.
4. Cover with plastic wrap and set to rest for 10 mins.
5.
In the meantime, portion out balls of the filling depending on the size
of your molds a in the ratio 1/1. If you are using a 30g mold, ration
out 15g of filling to 15g of skin dough.
6. Once dough is rested, weight out the
proper grams and roll into balls. Place on clean flat surface or pastry
mat and flatten with hands until a disc is formed, about 1/8" to 3/16"
in thickness.
7. Wrap dough around filling and pinch
close, dust with glutinous rice flour and roll into a ball. You may
also dust the inside of the mold to prevent the mooncake from sticking,
but make sure you shake out the extra flour. Place mooncake ball in mold
and press onto flat surface. Knock it out if using traditional molds
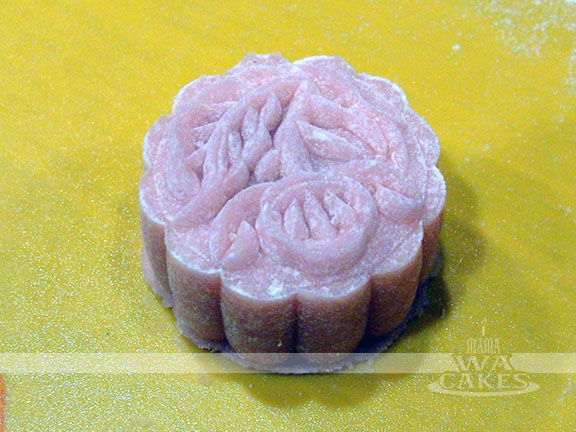
or plunge out if using the modern plastic molds.
8. Place in an airtight container and chill before enjoying! Please eat within 5 days for freshness!
The end quantity highly depends on your mold. I can make 16 mini 30g mooncakes from this recipe.
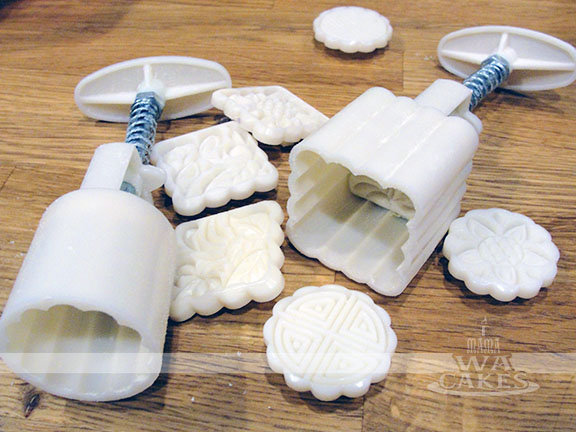 |
| Modern Mooncake Molds |
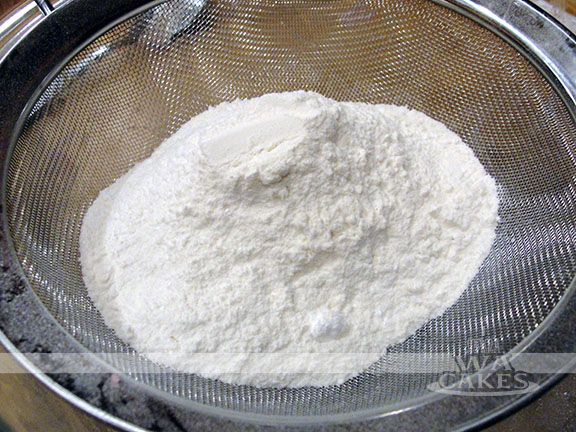 |
| Kou Fen, Wheat Starch, and powder sugar |
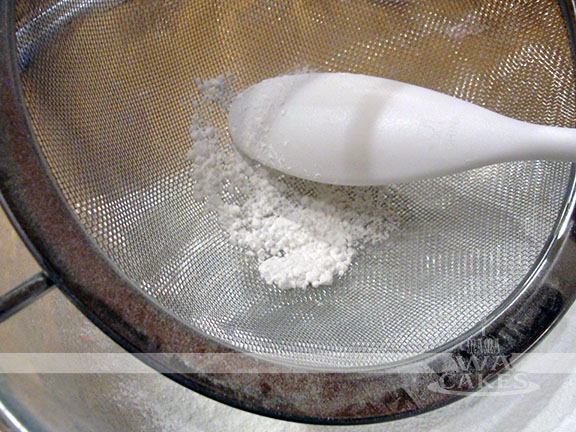 |
| Use a spoon to break up clumps when sifting |
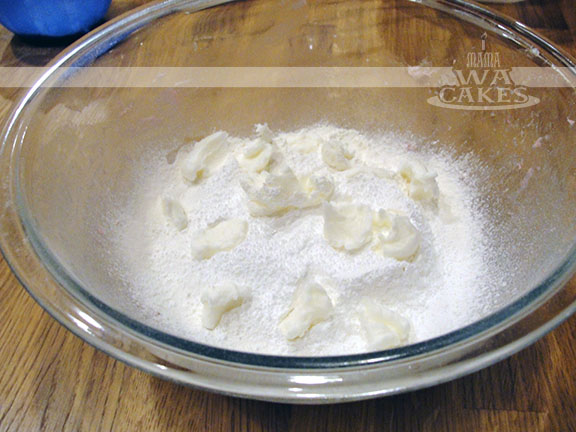 |
| Shortening broken in pieces |
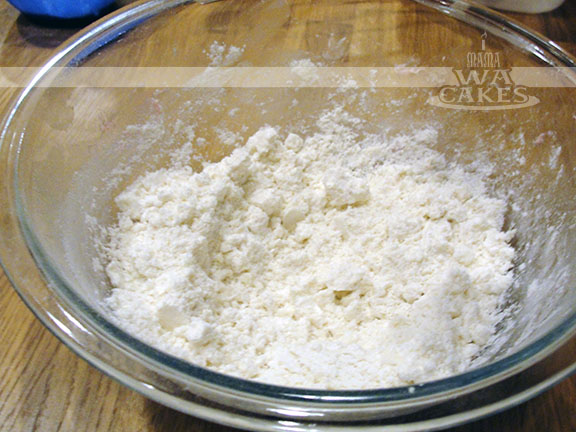 |
| Rub shortening into dry ingredients |
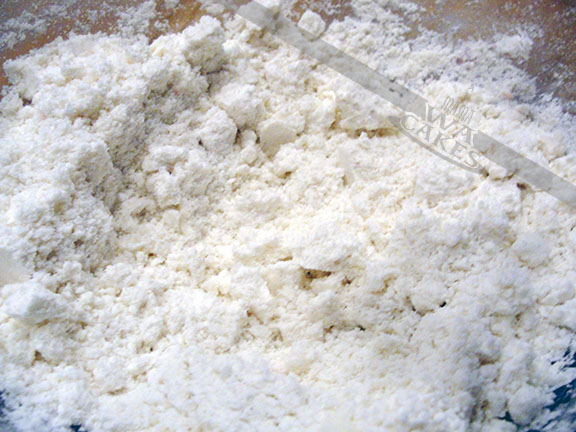 |
| Correct texture will be crumbly |
 |
| Add liquid and mix thoroughly |
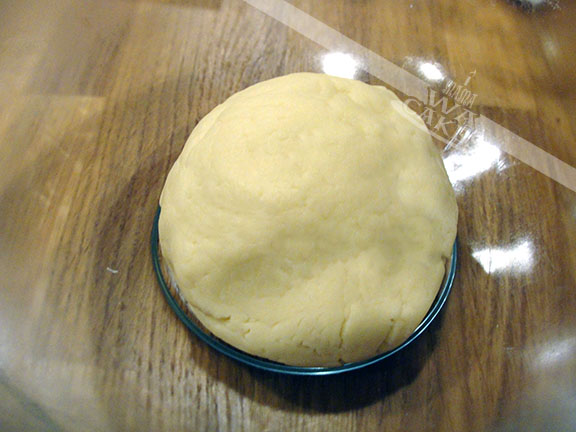 |
| Combine until a smooth soft dough is formed |
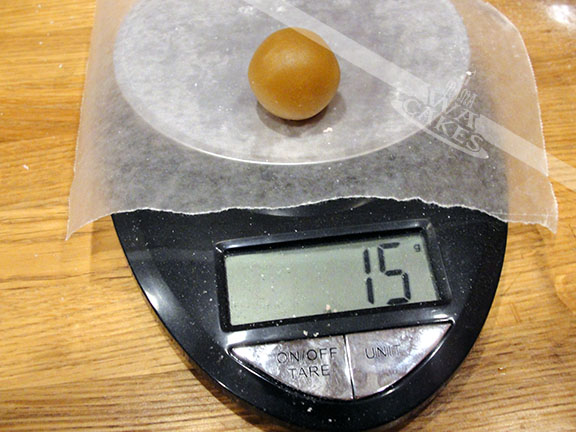 |
| Measure out filling per ratio for mold size |
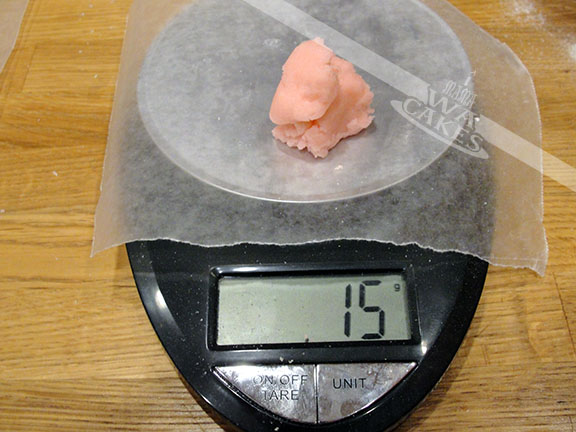 |
| Measure out skin dough per ratio for mold size |
 |
| Flatten ball of dough into a disc |
 |
| Place filling in center of disc |
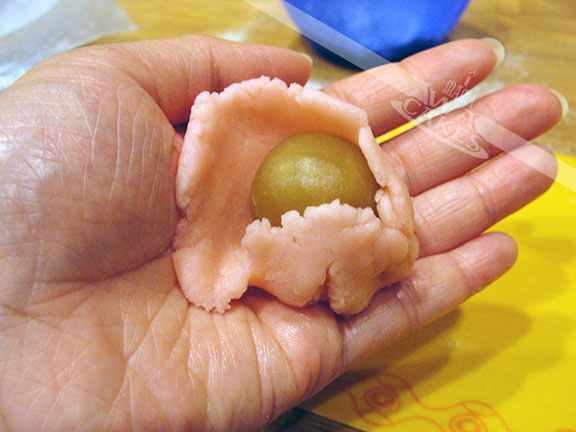 |
| Wrap dough around filling |
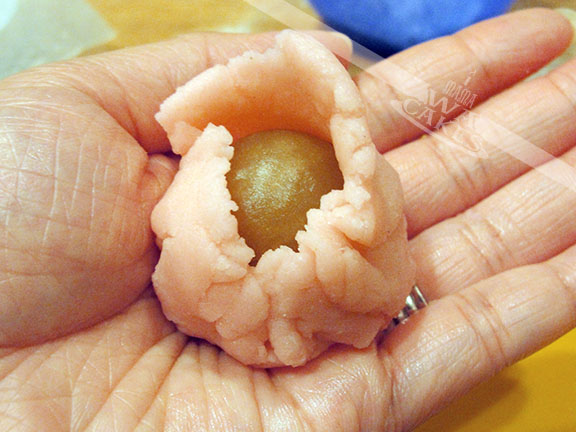 |
| Pinch close the opening |
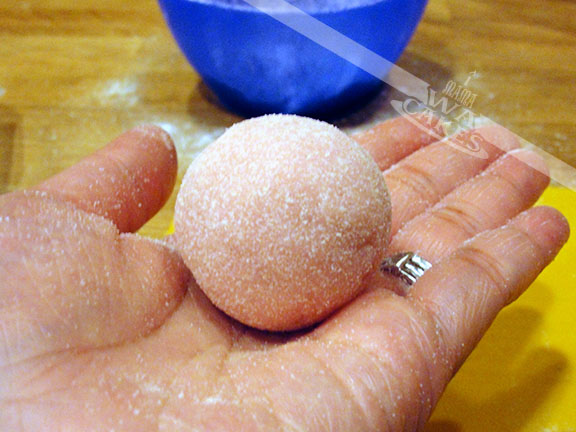 |
| Dust with extra Kou Fen and roll into a ball |
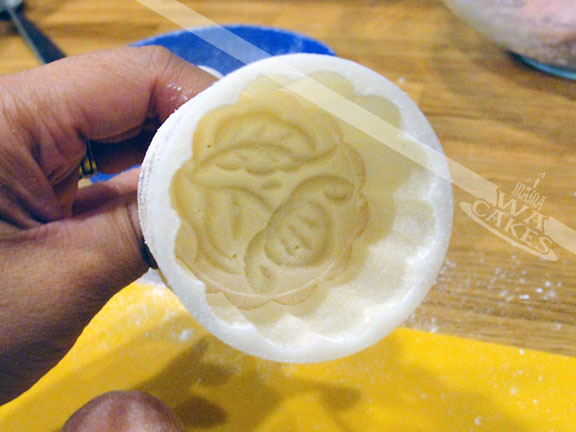 |
| Dust interior of mold and shake out excess |
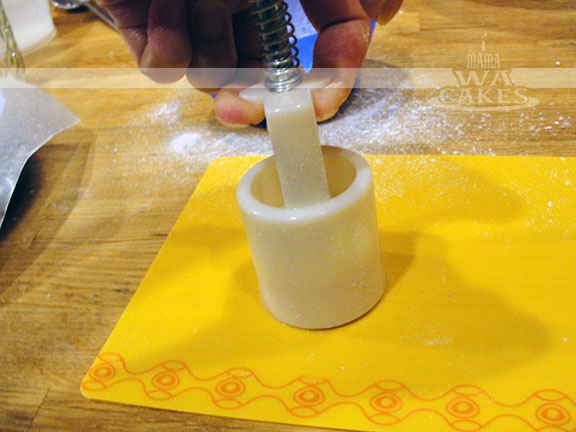 |
| Place mooncake ball into mold |
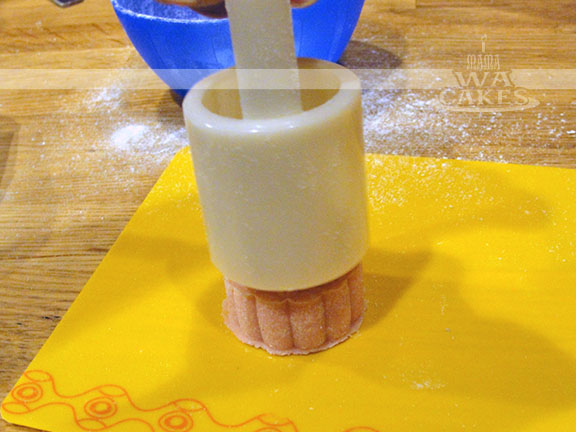 |
| Press down on plunger to release |
 |
| Peach Yogurt with Lotus paste filling |
 |
| Coffee with Lotus paste filling |
Summer of Love and Wedding Cakes
August 20, 2014
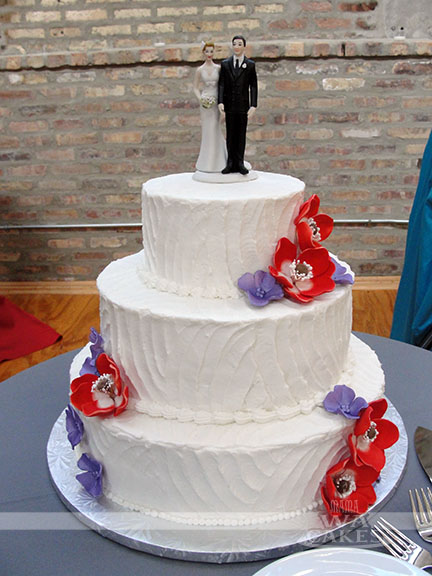
I can't believe that Labor Day is right around the corner, and that summer is coming to an end :( This summer was full of surprises, adventures, and lots of love in the air! I was lucky enough to not only attend two wonderful weddings, but was also asked to make their wedding cakes for their special day.
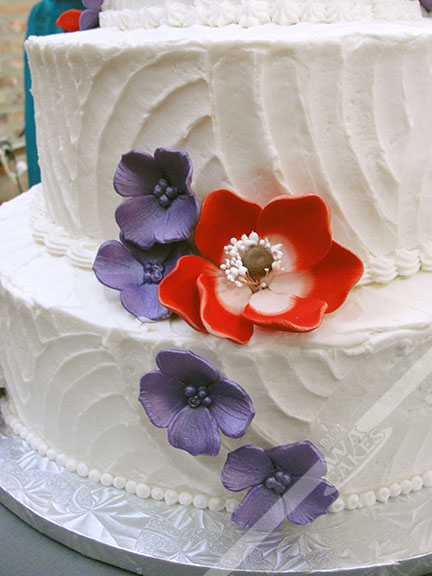
The first wedding cake was for my old friend, Laura. We met back in early 2003, and have been friends since. We used to have our weekly sushi lunches.... I'm getting hungry. She wanted something traditional, but not old fashion; modern, but not too over the top. After a few exchanges of ideas, I showed her a sketch of a buttercream cake with a modern swirled finish. The tiers would be accented with gumpaste and royal icing flowers of her wedding colors. The cakes were torted and filled with strawberry preserve, and crumb coated. I then used a Wilton icing tip and doubled iced the cakes. To achieve the finish, I used a small angled spatula and ran it across the sides in a radiating rainbow motion, and alternating the direction as I go. Make sure to overlap over the end of previous swirls. I did this for all the tiers before stacking them. Once stacked, I piped different borders on each tier. The cake was then accented with gumpaste red poppies and royal icing hydrangeas that were airbrushed with a lavender sheen for some sparkle.

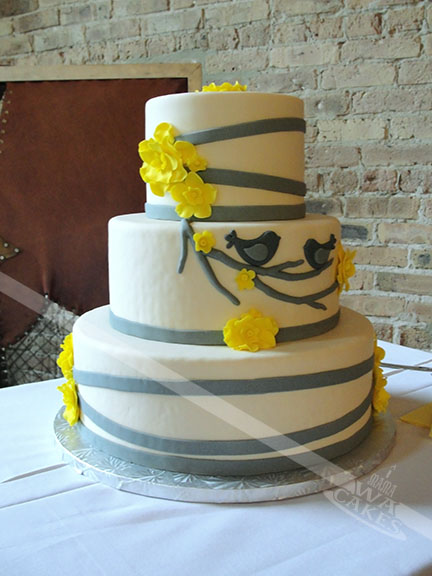
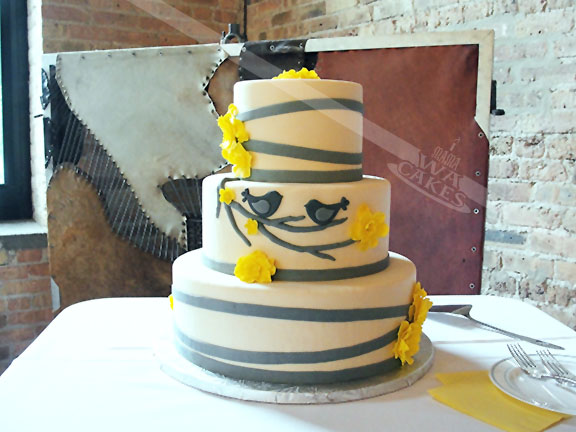 The second cake was for my co-worker and friend, Jenn. This cake was definitely different from any other I've made... only the top tier can be eaten! Jenn, as crazy as it may sound, is not a cake person... I know! Who doesn't love cake?! But, that didn't mean she was skimping on the sweets. She had an entire sweet table, candy buffet, and a popcorn corner! Needless to say, she didn't want to end up with tons of cake. However, she wanted one for show and a top tier for their 1st anniversary. The solution was to have two large dummy layers, and a top tier of scrumptious cake made with pink muscato champagne. We looked through the internet for inspiration, and we decided on a white base with ribbons of grey fondant. The pop of color came from the fantasy yellow flowers that were shaped from gumpaste. No wedding could be complete without lovebirds! The dummy cake layers were first prepped for the fondant by rounding the super sharp corners. I trimmed the corners with an blade to prevent them from tearing into the fondant. They were then misted with water, and then covered. The bottom layer was attached to the cake drum with skewers that I measured and trimmed. I just hammered it through the covered dummy cake until it hit the drum. The middle dummy cake was then attached to the bottom dummy with the same skewer method, except it didn't have reach the cake drum. The top cake tier was torted and filled with champagne buttercream. I cumb coated the cake and covered it in white fondant. The bottom and top tiers were then decorated in the same matter, with winding ribbons of grey. The middle was the canvas to a blossoming tree branch where the lovebirds perched. Due to the top heaviness of the cake (dummy cakes are really light), it is much safer to attach the top tier (which is much heavier) onsite. I simply placed it on top of the dummy layers and attached it with buttercream.

The first wedding cake was for my old friend, Laura. We met back in early 2003, and have been friends since. We used to have our weekly sushi lunches.... I'm getting hungry. She wanted something traditional, but not old fashion; modern, but not too over the top. After a few exchanges of ideas, I showed her a sketch of a buttercream cake with a modern swirled finish. The tiers would be accented with gumpaste and royal icing flowers of her wedding colors. The cakes were torted and filled with strawberry preserve, and crumb coated. I then used a Wilton icing tip and doubled iced the cakes. To achieve the finish, I used a small angled spatula and ran it across the sides in a radiating rainbow motion, and alternating the direction as I go. Make sure to overlap over the end of previous swirls. I did this for all the tiers before stacking them. Once stacked, I piped different borders on each tier. The cake was then accented with gumpaste red poppies and royal icing hydrangeas that were airbrushed with a lavender sheen for some sparkle.
Congrats again to the two couples!!!!
Subscribe to:
Posts (Atom)


Social Icons