
posts in
Wedding
Summer of Love and Wedding Cakes
August 20, 2014
I can't believe that Labor Day is right around the corner, and that summer is coming to an end :( This summer was full of surprises, adventures, and lots of love in the air! I was lucky enough to not only attend two wonderful weddings, but was also asked to make their wedding cakes for their special day.
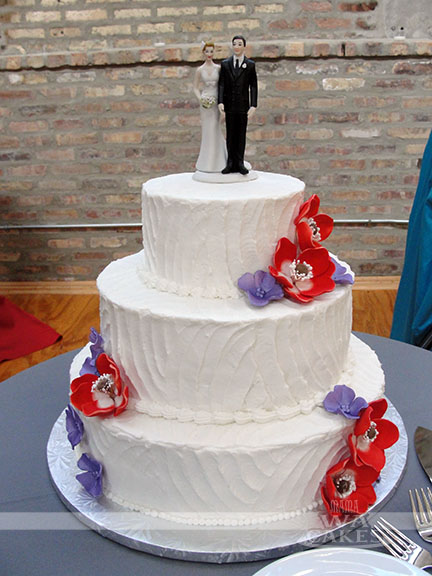
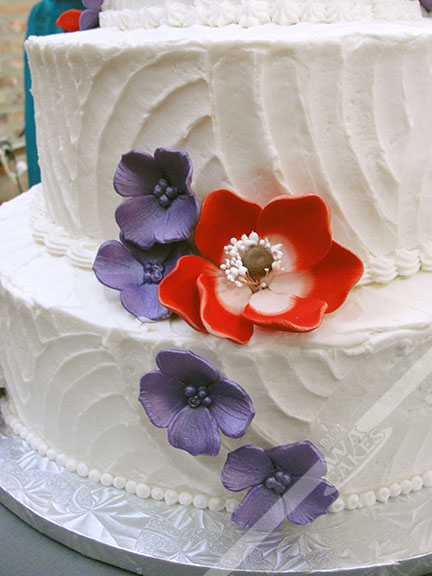
The first wedding cake was for my old friend, Laura. We met back in early 2003, and have been friends since. We used to have our weekly sushi lunches.... I'm getting hungry. She wanted something traditional, but not old fashion; modern, but not too over the top. After a few exchanges of ideas, I showed her a sketch of a buttercream cake with a modern swirled finish. The tiers would be accented with gumpaste and royal icing flowers of her wedding colors. The cakes were torted and filled with strawberry preserve, and crumb coated. I then used a Wilton icing tip and doubled iced the cakes. To achieve the finish, I used a small angled spatula and ran it across the sides in a radiating rainbow motion, and alternating the direction as I go. Make sure to overlap over the end of previous swirls. I did this for all the tiers before stacking them. Once stacked, I piped different borders on each tier. The cake was then accented with gumpaste red poppies and royal icing hydrangeas that were airbrushed with a lavender sheen for some sparkle.

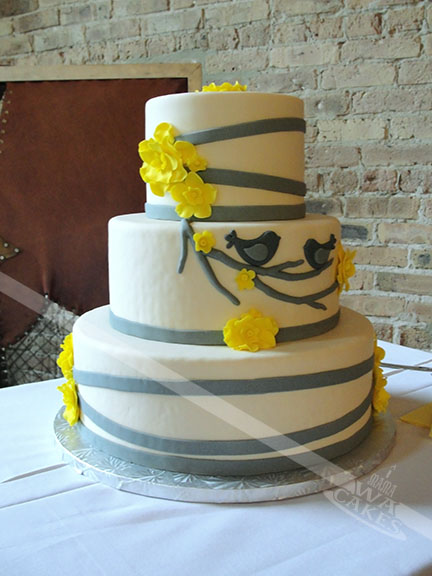
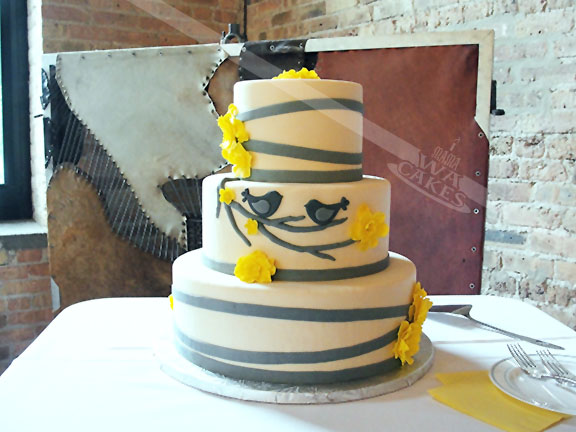 The second cake was for my co-worker and friend, Jenn. This cake was definitely different from any other I've made... only the top tier can be eaten! Jenn, as crazy as it may sound, is not a cake person... I know! Who doesn't love cake?! But, that didn't mean she was skimping on the sweets. She had an entire sweet table, candy buffet, and a popcorn corner! Needless to say, she didn't want to end up with tons of cake. However, she wanted one for show and a top tier for their 1st anniversary. The solution was to have two large dummy layers, and a top tier of scrumptious cake made with pink muscato champagne. We looked through the internet for inspiration, and we decided on a white base with ribbons of grey fondant. The pop of color came from the fantasy yellow flowers that were shaped from gumpaste. No wedding could be complete without lovebirds! The dummy cake layers were first prepped for the fondant by rounding the super sharp corners. I trimmed the corners with an blade to prevent them from tearing into the fondant. They were then misted with water, and then covered. The bottom layer was attached to the cake drum with skewers that I measured and trimmed. I just hammered it through the covered dummy cake until it hit the drum. The middle dummy cake was then attached to the bottom dummy with the same skewer method, except it didn't have reach the cake drum. The top cake tier was torted and filled with champagne buttercream. I cumb coated the cake and covered it in white fondant. The bottom and top tiers were then decorated in the same matter, with winding ribbons of grey. The middle was the canvas to a blossoming tree branch where the lovebirds perched. Due to the top heaviness of the cake (dummy cakes are really light), it is much safer to attach the top tier (which is much heavier) onsite. I simply placed it on top of the dummy layers and attached it with buttercream.

The first wedding cake was for my old friend, Laura. We met back in early 2003, and have been friends since. We used to have our weekly sushi lunches.... I'm getting hungry. She wanted something traditional, but not old fashion; modern, but not too over the top. After a few exchanges of ideas, I showed her a sketch of a buttercream cake with a modern swirled finish. The tiers would be accented with gumpaste and royal icing flowers of her wedding colors. The cakes were torted and filled with strawberry preserve, and crumb coated. I then used a Wilton icing tip and doubled iced the cakes. To achieve the finish, I used a small angled spatula and ran it across the sides in a radiating rainbow motion, and alternating the direction as I go. Make sure to overlap over the end of previous swirls. I did this for all the tiers before stacking them. Once stacked, I piped different borders on each tier. The cake was then accented with gumpaste red poppies and royal icing hydrangeas that were airbrushed with a lavender sheen for some sparkle.
Congrats again to the two couples!!!!
Mark V Helmet Wedding Cake
February 5, 2014
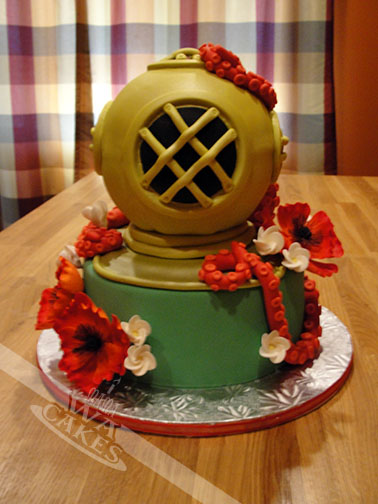
I hope everyone had a wonderful holiday, and a great start to a new year! My past year has been very busy, and time just really flew by. It's been almost 5 months since my last post! As I was going back through my photos, I realized that there was one cake that I never posted about and was definitely worth sharing. I learned so much from designing it, and it forced me to tackle the one thing I dread... covering a sphere with fondant. The idea scares me, and on top that, this cake had to look like an awesome Mark V diving helmet. Chelsey wanted her wedding cake to be a surprise for her husband-to-be who is a professional deep sea diver.
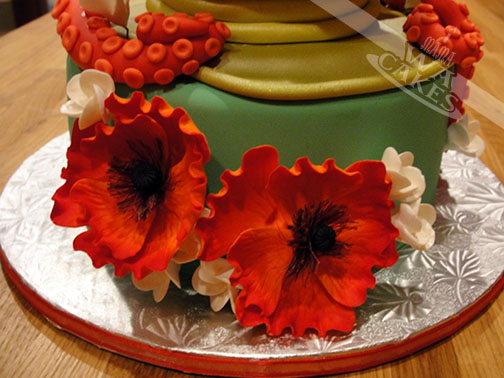
To start off with this design, I created some beautiful red poppies and ivory frangipani out of gumpaste a week prior. I let them dry completely before assembly, and always make extra since accidents can happen. A great tutorial on making gumpaste poppies can be found here. This is was very helpful for me, but of course I used a slightly different cutter. Once they were dry, I used luster dust to add some natural color gradations. The great thing about making gumpaste flowers is that they can be made weeks ahead of time and stored until you're ready to use them.
Next, it was time to dive into the cake, no pun intended :) I knew the dimensions of the cake so I baked two 8" rounds of red velvet, and the same flavor in a 6" Wilton Sports Ball pan. It comes in two hemispheres that are filled, baked, and then stacked to make a 6" ball. The baking seemed easy enough, but the assembly of the different layers had me thinking. My first attempt at the helmet layers resulted in a very squashed bottom half. The weight of the buttercream and fondant would need some extra support. That was when I ditched the bottom cake half and opted for a 6" styrofoam hemisphere. This was perfect! Rule of thumb when dealing with styrofoam... don't let it touch the cake! I gave it a small flat bottom with a knife so it wouldn't roll, and covered it in plastic wrap. A 6" cake board was then placed on top, held in place with a dollop of buttercream. I then placed the top half of the cake ball on it. The sphere was crumb coated and ready for fondant...DUM DUM DUM DUM! You could only imagine that I'm very nervous by now. I gathered myself...took some deep breathes, and proceeded as I knew how. Some people would cover one half, and flip it over to do the other. I wanted no seams so I covered it all in one shot. I set the cake ball on a plastic tub that was smaller in diameter to give me a nice pedestal to work with. This allows me to get the fondant as close to the bottom without having a table top being in the way. I rolled out a light yellow fondant and laid it over my cake ball. Working my way from top to bottom, I rubbing it down inch by inch, lifting any pleats to get it smooth. I continued until I got all the way to the bottom and trimmed away any excess. Phew! The hardest part was over.
 The next step was to prep the bottom layers for the covered ball. I stacked the (2) 8 inch rounds, filled with cream cheese frosting, and crumb coated them in buttercream. This layer then received a smooth blanket of kelly green fondant. Support for the helmet layer was very crucial at this point. I trimmed down a 6" cake board to fit below the flat bottom of the styrofoam part, about 2 inch diameter. I located the center of the cake, and inserted 4 wooden dowels within the size of the mini cake board, and on top of that, I piped a couple dots buttercream. This will hold the cake board in place once it's on the wooden dowels and on the cake below. To create a more finished and cohesive look, I rolled out a rectangular piece of yellow fondant and laid it over the mini cake board and cake to create the collar of the helmet. I gently rubbed down on the fondant along the edge of the cake board so I could locate it. I wanted to make sure that the cake stayed centered. The helmet layer was gently lifted and positioned over the cake board and secure in place with a dollop of royal icing. You can also insert a long dowel through the whole cake to really hold it in place at this point. I know it's a lot to take in, but I hope my illustration to the left would help :)
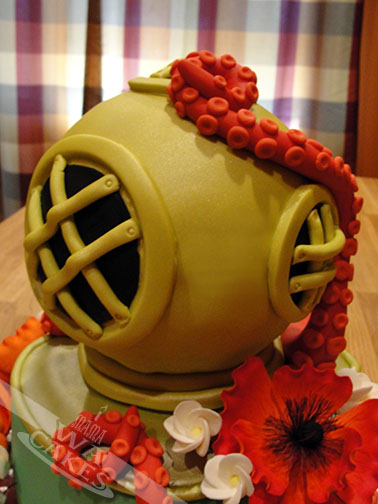
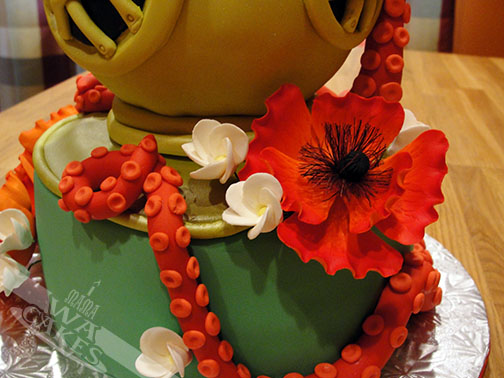
 Once the cake was fully assembled, it was time to finish decorating! I rolled out ropes of fondant and created the signature windows of the Mark V, and trimmed off the edges of the collar. I then airbrushed the yellow parts of helmet with a gold shimmer for a metallic look. Another key element to the cake were the octopus tentacles that look like they are ready to envelop the Mark V. To create these, I rolled out long tapered ropes of red fondant and adhered them to the cake. I started at the base of the collar on the back side, and wrapped the tentacles around the helmet as realistic as I could. I then made small balls of light red fondant that I flattened with a ball tool for the suckers. I used a small detail brush and water to attach them to the tentacles. This made them so life-like! For the final touch, I inserted the gumpaste flowers to soften it up for the bride.
To start off with this design, I created some beautiful red poppies and ivory frangipani out of gumpaste a week prior. I let them dry completely before assembly, and always make extra since accidents can happen. A great tutorial on making gumpaste poppies can be found here. This is was very helpful for me, but of course I used a slightly different cutter. Once they were dry, I used luster dust to add some natural color gradations. The great thing about making gumpaste flowers is that they can be made weeks ahead of time and stored until you're ready to use them.
Next, it was time to dive into the cake, no pun intended :) I knew the dimensions of the cake so I baked two 8" rounds of red velvet, and the same flavor in a 6" Wilton Sports Ball pan. It comes in two hemispheres that are filled, baked, and then stacked to make a 6" ball. The baking seemed easy enough, but the assembly of the different layers had me thinking. My first attempt at the helmet layers resulted in a very squashed bottom half. The weight of the buttercream and fondant would need some extra support. That was when I ditched the bottom cake half and opted for a 6" styrofoam hemisphere. This was perfect! Rule of thumb when dealing with styrofoam... don't let it touch the cake! I gave it a small flat bottom with a knife so it wouldn't roll, and covered it in plastic wrap. A 6" cake board was then placed on top, held in place with a dollop of buttercream. I then placed the top half of the cake ball on it. The sphere was crumb coated and ready for fondant...DUM DUM DUM DUM! You could only imagine that I'm very nervous by now. I gathered myself...took some deep breathes, and proceeded as I knew how. Some people would cover one half, and flip it over to do the other. I wanted no seams so I covered it all in one shot. I set the cake ball on a plastic tub that was smaller in diameter to give me a nice pedestal to work with. This allows me to get the fondant as close to the bottom without having a table top being in the way. I rolled out a light yellow fondant and laid it over my cake ball. Working my way from top to bottom, I rubbing it down inch by inch, lifting any pleats to get it smooth. I continued until I got all the way to the bottom and trimmed away any excess. Phew! The hardest part was over.
The next step was to prep the bottom layers for the covered ball. I stacked the (2) 8 inch rounds, filled with cream cheese frosting, and crumb coated them in buttercream. This layer then received a smooth blanket of kelly green fondant. Support for the helmet layer was very crucial at this point. I trimmed down a 6" cake board to fit below the flat bottom of the styrofoam part, about 2 inch diameter. I located the center of the cake, and inserted 4 wooden dowels within the size of the mini cake board, and on top of that, I piped a couple dots buttercream. This will hold the cake board in place once it's on the wooden dowels and on the cake below. To create a more finished and cohesive look, I rolled out a rectangular piece of yellow fondant and laid it over the mini cake board and cake to create the collar of the helmet. I gently rubbed down on the fondant along the edge of the cake board so I could locate it. I wanted to make sure that the cake stayed centered. The helmet layer was gently lifted and positioned over the cake board and secure in place with a dollop of royal icing. You can also insert a long dowel through the whole cake to really hold it in place at this point. I know it's a lot to take in, but I hope my illustration to the left would help :)Once the cake was fully assembled, it was time to finish decorating! I rolled out ropes of fondant and created the signature windows of the Mark V, and trimmed off the edges of the collar. I then airbrushed the yellow parts of helmet with a gold shimmer for a metallic look. Another key element to the cake were the octopus tentacles that look like they are ready to envelop the Mark V. To create these, I rolled out long tapered ropes of red fondant and adhered them to the cake. I started at the base of the collar on the back side, and wrapped the tentacles around the helmet as realistic as I could. I then made small balls of light red fondant that I flattened with a ball tool for the suckers. I used a small detail brush and water to attach them to the tentacles. This made them so life-like! For the final touch, I inserted the gumpaste flowers to soften it up for the bride.Welker Square Offset Wedding Cake
September 26, 2013
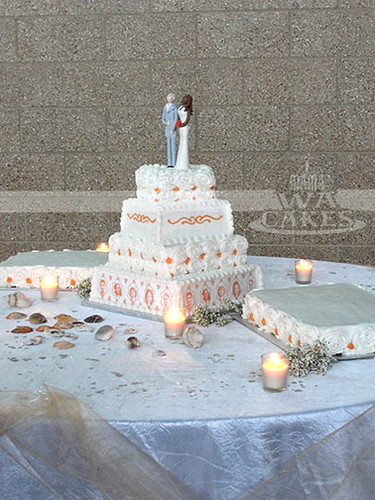
Last month, I had the opportunity to create a wonderful and meaningful cake for my co-worker and his fiancée. The cake was simple, yet elegant, with a touch of fun. When it came down to the decoration, I had free reign as long as the cake was offset and that their children were incorporated in the design. The offset cake symbolized their journey together, and their children were, of course, an important part of their lives. They were two individual families that will be joined as one on that special day.
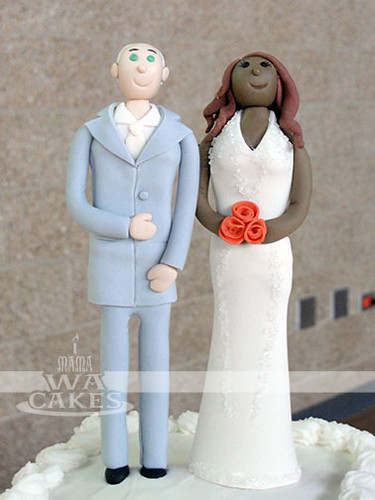
 Toppers done, and it's time for the cake... lots of cake. The cake was made up of 4 offset square tiers, rotated to the left until the corners almost met the edge of the one below. Each tier consisted of one layer of chocolate and one layer of vanilla cake, sandwiched around a layer of rich buttercream. These were then all iced in buttercream, alternating a smooth finish with one covered in large roses. I love covering whole cakes in large buttercream star tip roses. It is a simple technique that looks so dramatic. To incorporate the kids into the design, but keeping with the elegance of the cake, I created printed edible images of the kids in the coral accent color. I edited the images in Photoshop to remove the background, and then laid them out in Illustrator with decorative borders to compliment the overall design of the cake. I wanted their images to be part of the cake, not take away from elegance, or take away from the toppers. The edible images were attached to the buttercream on the bottom tier before it crusted over. I then pipes scallops along the edges. I finished off the cake with dots of coral in between the roses, and a simple scroll to tie in their wedding colors. The same treatment was duplicated on two sheet cakes that I also baked for extra servings. That is a great way to feed a large number of guest without having to pay for a super huge wedding cake.
Congrats to the S and N!

Stephanie's Chevron Bridal Shower Cake
July 17, 2013
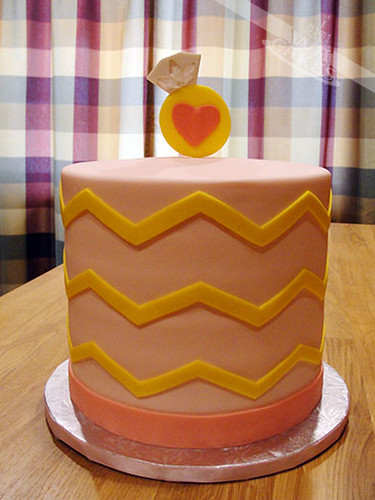
 This tall cake is made of alternating layers of chocolate and strawberry cake filled with strawberry preserve. I wish I had a photo of the served cake just so you could what the layers looked like. Whenever a cake is so tall, I like to separate the cake in half with a hidden cake board that is trimmed slightly smaller than the diameter of the cake. Boba straws were inserted into the bottom half to support the weight of the top half. I find that Boba straws are easier to use and cut than wooden cake dowels. This trick makes the cake stable and easier to serve, because cutting an 8" tall slice of cake can be a bit tricky and messy. I made an illustration of the cake construction so you can see what I did. I hope that helps!
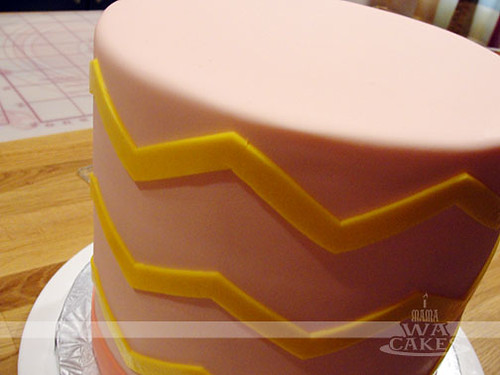
All the layers were then crumb coated in buttercream, with some piped into space around the middle to hide the cake board. The cake was then covered in a blanket of soft pale pink, and the bottom edge was finished with a darker pink ribbon of fondant. Now, here comes the fun part...Chevrons!!! For the chevrons, I measured the circumference of my cake after I covered it with fondant. I then used that number and created my chevron template to cut out them out with, but this is where the wax paper method comes into play. Instead of just cutting out long strips of the chevron and painstakingly trying to align them on the cake, I cut them out on a long sheet of wax paper that is the height and length of my cake. The cut fondant sticks to the wax paper in the same positions as if they were on my cake. I then transfer the chevrons onto my cake by aligning the wax paper with my cake and wrapping it around and meeting up at only one seam. Tada!

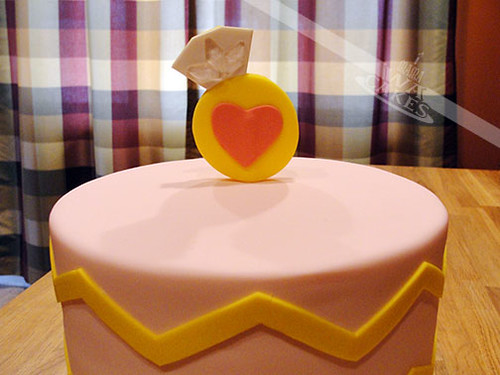 Not that the cake wasn't pretty with just the chevrons, but I just had to make a ring topper that had some sugar diamonds on it. No wedding ring is complete without any type of bling on it :) I made this by hand cutting out two layers of the ring shape, and sandwiching a popsicle stick in between. I then cut out a heart for front and a white layer for the diamond. With some sugar glue, I attached the three sugar diamonds to the white diamond area. This was definitely a fun and pretty cake for such a special event. Congrats Stephanie!
Spring Birthdays and Linda's Bridal Shower!
May 9, 2013
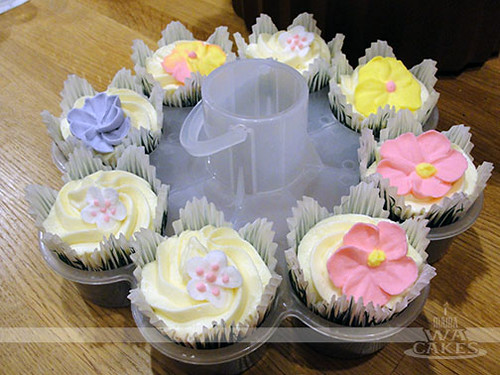
Spring is here! Well, as spring-like as we can get here in Chicago. The past month literally had an identity crisis and given us all 4 seasons in four weeks. On those days that dipped slightly below average or poured cats and dogs, I was able to create these sweet treats to bloom my mood :)
First up are these lovely spring floral cupcakes for Eumi. These mocha cupcake are filled and topped with coconut whipped cream. The richness of the chocolate and coffee is complimented by the delicate finish of the coconut. The aroma warms you, and the royal icing flowers brings out a smile.
 TIP: Royal icing flowers can be made ahead of time and stored in air-tight containers for whenever you want to make a treat bloom. I usually pipe a variation of colors and flower types to give me options.
Next in line are these cupcakes for Bahra. She wanted to surprise her sister for her 30th birthday with 30 of these yummy goodness. Bahra had tasted one of Eumi's cupcakes (above), and wanted to share them with her sister in Atlanta. Yes, these babies got on a plane and crossed state lines :)
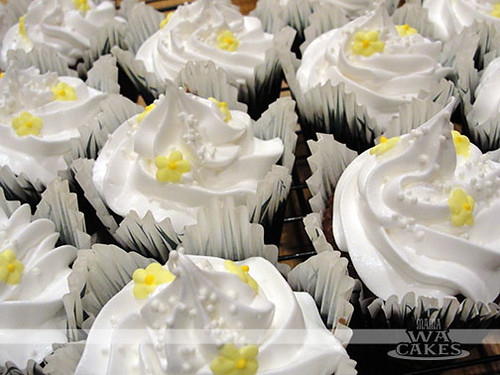
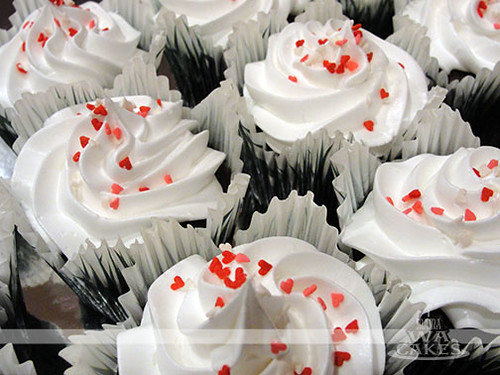
Half of these were milk chocolate cake filled with yummy coconut whipped cream, and adorned with more of the fluffy goodness. To keep with the spring theme, I finished them with a dash of nonpareils and mini yellow drop flowers. The remaining half were rich dark chocolate cake filled with raspberry preserve. The tartness of the preserve balanced the decadence of the cake. Airy peaks of whipped cream floated on top with a gentle helping of red heart sprinkles for the sisterly love.

Last, but not least, is this lovely cake for my baby sister who getting married this weekend! If you have been following my blog, you have seen one of the other cakes I've made for Linda. I have always enjoyed designing and creating cakes for her, but this one was special... it was her bridal shower, after all. Almost every cake I've made her in the past have been intricate fondant designs. I wanted this one to be simple, elegant, uplifting, and beautiful as she is. Oh, and of course purple! She loves purple :)
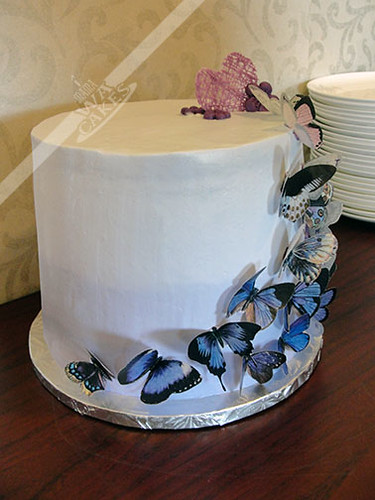
This 8 inch tall x 8 inch round beauty is stacked tall of moist white cake filled with layers of fresh mango and whipped cream. The assembled cake was then covered in a light ombre of purple to offset the rich colors of the edible butterflies. To create the ombre effect, I tinted coconut whipped icing (pretty popular the past month) and piped on bands of colors using a icing tip. I started and the bottom of the cake with the darkest and worked my way to the top, each band becoming a lighter shade. The top of the cake matched the last band of color I piped around the sides.
 TIP: To create the shades of purple, I tinted the half of the whipped icing the darkest shade I wanted. After piping on a band of the darkest shade, I then added some of the white whipped icing to the remaining purple to lighten it. Continue until you get to the top of the cake and you got all the various shades of purple without all the extra bowls!
 Once all the various shades were on the cake, I smoothed out the bands of color in gentle horizontal strokes with my 15in angled spatula. This blends the bands of colors seamlessly and creates the trendy ombre effect! Once the sides were done, I smoothed out the top of the cake and prepped for the butterflies. The butterflies are edible and are printed on wafer paper. They were hand cut and folded down the center for life-like dimension. I then dipped the center of the butterflies in purple candy melt. This step helped to prevent the butterflies from becoming soggy or limp once attached to the whipped icing. The butterflies were then attached to cake in a sweeping gradation to compliment the ombre cake. The cake was then finished with a candy drizzle heart I made. Congrats sis!
First up are these lovely spring floral cupcakes for Eumi. These mocha cupcake are filled and topped with coconut whipped cream. The richness of the chocolate and coffee is complimented by the delicate finish of the coconut. The aroma warms you, and the royal icing flowers brings out a smile.
Next in line are these cupcakes for Bahra. She wanted to surprise her sister for her 30th birthday with 30 of these yummy goodness. Bahra had tasted one of Eumi's cupcakes (above), and wanted to share them with her sister in Atlanta. Yes, these babies got on a plane and crossed state lines :)
Half of these were milk chocolate cake filled with yummy coconut whipped cream, and adorned with more of the fluffy goodness. To keep with the spring theme, I finished them with a dash of nonpareils and mini yellow drop flowers. The remaining half were rich dark chocolate cake filled with raspberry preserve. The tartness of the preserve balanced the decadence of the cake. Airy peaks of whipped cream floated on top with a gentle helping of red heart sprinkles for the sisterly love.
Last, but not least, is this lovely cake for my baby sister who getting married this weekend! If you have been following my blog, you have seen one of the other cakes I've made for Linda. I have always enjoyed designing and creating cakes for her, but this one was special... it was her bridal shower, after all. Almost every cake I've made her in the past have been intricate fondant designs. I wanted this one to be simple, elegant, uplifting, and beautiful as she is. Oh, and of course purple! She loves purple :)
This 8 inch tall x 8 inch round beauty is stacked tall of moist white cake filled with layers of fresh mango and whipped cream. The assembled cake was then covered in a light ombre of purple to offset the rich colors of the edible butterflies. To create the ombre effect, I tinted coconut whipped icing (pretty popular the past month) and piped on bands of colors using a icing tip. I started and the bottom of the cake with the darkest and worked my way to the top, each band becoming a lighter shade. The top of the cake matched the last band of color I piped around the sides.
Once all the various shades were on the cake, I smoothed out the bands of color in gentle horizontal strokes with my 15in angled spatula. This blends the bands of colors seamlessly and creates the trendy ombre effect! Once the sides were done, I smoothed out the top of the cake and prepped for the butterflies. The butterflies are edible and are printed on wafer paper. They were hand cut and folded down the center for life-like dimension. I then dipped the center of the butterflies in purple candy melt. This step helped to prevent the butterflies from becoming soggy or limp once attached to the whipped icing. The butterflies were then attached to cake in a sweeping gradation to compliment the ombre cake. The cake was then finished with a candy drizzle heart I made. Congrats sis!A season of cakes!
December 12, 2012

With the holidays coming, and bun baking in the oven... I realized that I haven't done an update forever! So, please forgive me for not going into detail as I normally do. This posting will be more of a listing of my busy cake season, but do ask me questions if you do have any :)



Bubble Guppies Birthday Cake for Olivia
Stacked vanilla cake with buttercream filling, adorned with edible plaques and fondant decorations.
Graduation Book Cake for Amy
Red Velvet cake with buttercream filling, decorated with fondant and silver luster dust.
Yo Gabba Gabba Cake for Pierson
Stacked Chocolate with Chocolate Bavarian Cream, Vanilla with Butercream, and Green Tea cake filled with Raspberry Preserve.
Queen of Hearts Bridal Shower Cake for Angela P.
Red Velvet cake with Cream cheese filling, topped with edible image to match invitation.
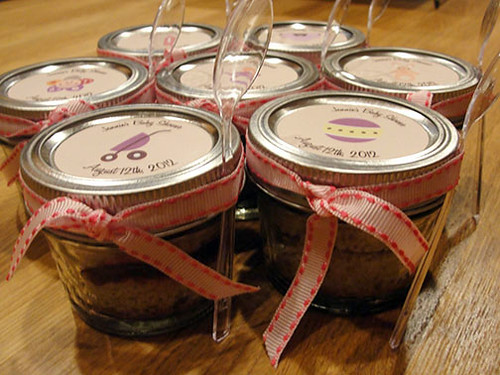
Baby Shower Cake Jar Favors for Jennie
Green Tea Cake layers nestled between raspberry preserve in mason jars.
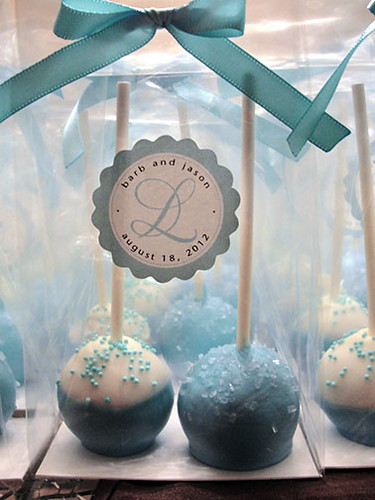
Wedding Cake Pop Favors for Barbara and Jason
Red Velvet and Chocolate Cake Pops covered in "Tiffany" blue and white candy coating, accented with nonpareils and sprinkles.
Bridal Shower Cake for Eumi
Butter Pound cake filled with fruit and bavarian cream, decorated in whipped cream petal technique. Custom edible plaque made to match invitation.
Peony Wedding Cake for Jennie!
May 23, 2011
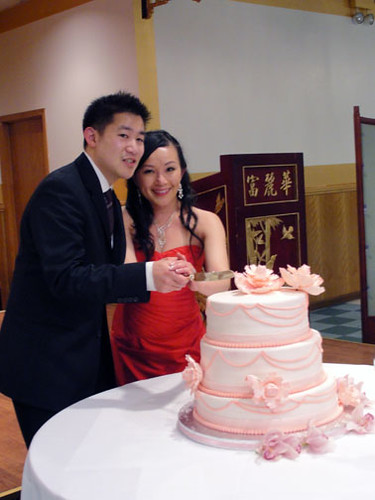
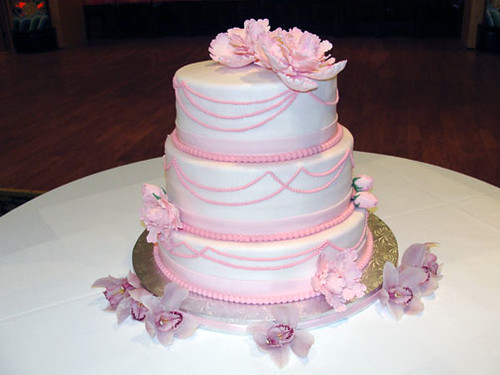
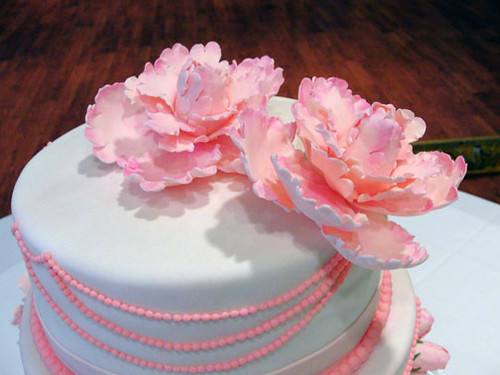
Since it's my sister, the cake had to be amazing and delicious. The design of the cake was left entirely to me. Creative freedom is always a plus in my book. Starting with the color palette, I chose her default color from childhood, Pink! Mine was blue, Jennie's was pink, and Linda's was purple (and still is). I decided to use different shades of pink and in different values. I wanted the cake to look monochromatic elegant, and not Barbie childish. After selecting the colors, I created the design by taking notes from their two wedding invites. The first invite was from their actual wedding, whose contemporary graphics consisted of light pink swagging strings of beads. The invite for the Chicago event was a modern take on the traditional Chinese invitation, whose embossed peonies became my main decorative element.

Congrats again sis, and welcome to our crazy family, Steven!
Blue Lace Bridal Shower Cake for June!
October 26, 2010
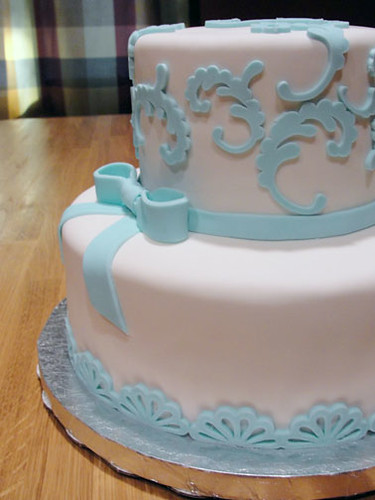
The next morning, as I called Grace, my heart started to steady as she spoke in a calming voice and said, "I trust you and your designs". That was all I needed to hear, and to know that I had complete artistic control over this cake. I was full of spunk again. After some careful planning, the cake was completed before I knew it.

Simple Spring Wedding Cake
September 19, 2010


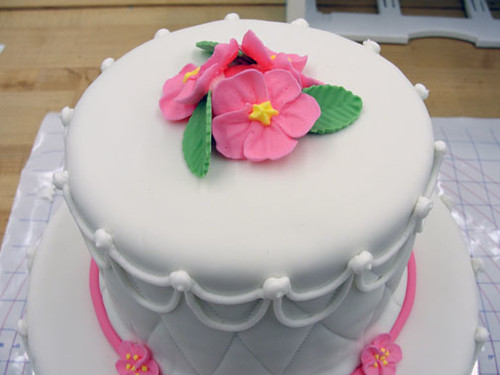
I know that the season had come and gone, but the name says it all when it comes to the simple elegant design of this lovely and delicious cake. From the refreshing lemon filling, to the bright colored primroses, there's a wonderful notion of one of my favorite seasons. This season brings new growth, a splash of color to the world around us, and love is really in the air. This cake just breathes that idea when I look at it.
Subscribe to:
Posts (Atom)


Social Icons