
posts in
birthday
Six Months Later... So Many Cakes!
June 15, 2015

Long time no blog! I can't believe it's been six months since my last post, and I have so much to share! The last few months have been a little crazy for me... trying to balance a 9-5, my son's school schedule, a very active toddler, and my baking addiction has pulled me away from updating my blog. Don't fret! I have plenty to share, and I apologize ahead for this lengthy post. The last few cakes I made were for my friends, and friends of family. They were fun to design, a pleasure to bake, but most of all, it was exciting to try out new techniques and ideas.
 This was my first drum cake, and I used a photo of Jesael's drum set as reference. I stacked two 8 inch rounds and covered it in white fondant. I then wrapped a long strip around the side of the cake, making sure it was 1/8 inch taller to create the rim. I dusted the top center of the cake with ivory petal dust to mimic the wear of the real drum. To make it more realistic, I used a paper towel and wiped away some luster dust in long straight strokes to mimic the dragging of a drum stick. I then combined several shades of brown into a swirled pattern, and shaped the drumsticks. This made them look like real warm-colored wood. I finished off the cake with silver accents such as the oval lugs, rims, name plate, and the tension rods were lollipop sticks covered in luster dust. This looked so good that some of the guest tried to play it when it was on the table!
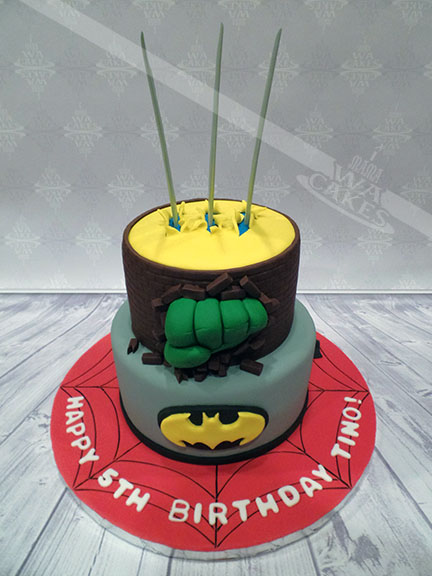
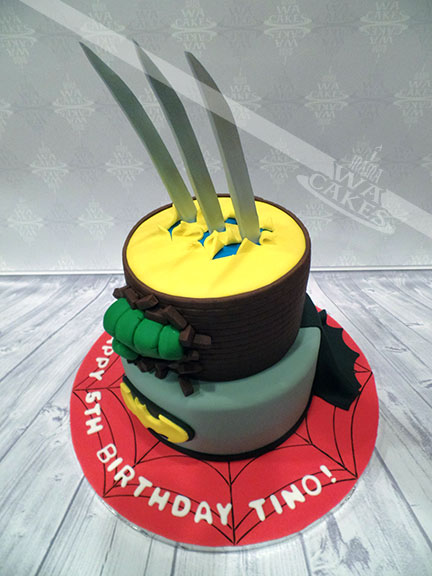 I have made plenty of super hero cakes in the past, but none of them were quite like this. This cake contained several multi-dimensional work. I had to think about my base/background, and what would work in the foreground. On top of that, I had to combine elements of 4 different characters in a cohesive design. After a few sketches, I decided on Spider-man's web as the base. I covered the cake drum in red fondant, and drew on the web with a black edible marker. The web created the perfect foundation for rest of the cake... it appears as though the cake is supported by the web. Next tier was all about Batman. I covered the cake in the classic gray with a free-flowing black cape hanging off the back. The recognizable Bat logo was given depth with a black oval and the yellow bat overlay. The next tier was my fave to create. I textured the side to mimic a brick wall, and shaped Hulk's fist out of a thick, flattened green oval. I cut slits into it to mimic the fingers, and rolled them in as if making a fist. I then used a veining tool and created the creases around the knuckles. Individual brick pieces were then cut and attached around the fist to simulate Hulk breaking through the wall. The very top of the cake was covered with a bright blue and then a layer of yellow. I made several small cuts into the yellow layer only and folded it back to look like shredded fabric. The signature Wolverine claws were shaped out of gumpaste, and left to dry a week prior to baking this cake. Using an air brush, I covered the claws in a edible metallic silver sheen, and created darker shadows with a slate blue. These were then inserted into the cake in the three areas once the color had dried. Doesn't it look like Wolverine clawing his way out?!
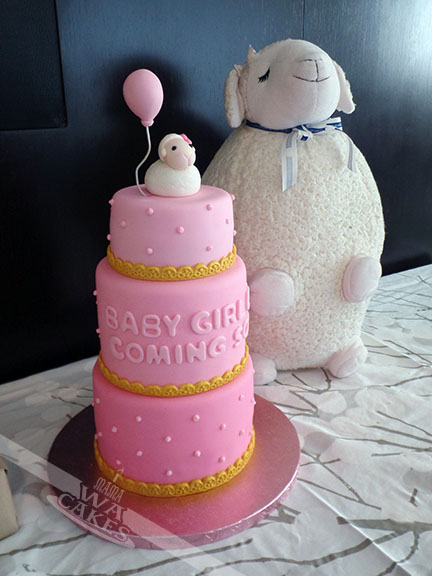
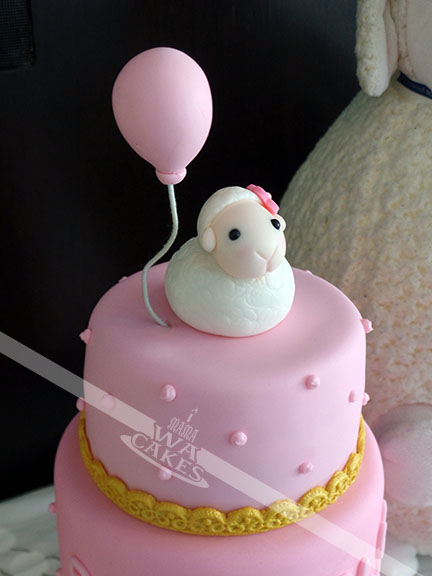 There is nothing cuter in this world than a baby lamb cake. Except for a pink ombre, baby lamb cake! The gradation of colors gave this simple and chic cake depth, and leads your eyes up the tall cake to where the little guy sits. I mixed three different shades of pink, covering the bottom cake in the darkest, and the lightest on top. All three cakes were stacked to created an overall height of 12 inches. Each cake was then accented with molded fondant lace that I covered with gold luster dust. With same medium shade, I cut out the message for the second tier to not break up the ombre effect. I then piped little swiss dots on the rest of the cake. The cake was so pretty, but no baby shower cake can be complete without an extra dose of cuteness. The star of cake was the fondant lamb and gumpaste balloon topper... this has got to the most adorable thing I've made so far! She was shaped out of two balls of fondant... the body was an oval and the head was more of a teardrop. For the fleece, I used a large round tip and made overlapping impressions all over the body. This method was simple and very effective. I used the same method for the small cap of fleece on her head, and accented it with a small pink flower. The ears were small teardrops of fondant, while the eyes were small black sugar pearls. I used a veining tool for her nose and mouth, and completed the look with a touch of pink luster dust for some rosiness. What do you think?!

Drum Cake For Jesael
Super Hero Mash-Up
I have made plenty of super hero cakes in the past, but none of them were quite like this. This cake contained several multi-dimensional work. I had to think about my base/background, and what would work in the foreground. On top of that, I had to combine elements of 4 different characters in a cohesive design. After a few sketches, I decided on Spider-man's web as the base. I covered the cake drum in red fondant, and drew on the web with a black edible marker. The web created the perfect foundation for rest of the cake... it appears as though the cake is supported by the web. Next tier was all about Batman. I covered the cake in the classic gray with a free-flowing black cape hanging off the back. The recognizable Bat logo was given depth with a black oval and the yellow bat overlay. The next tier was my fave to create. I textured the side to mimic a brick wall, and shaped Hulk's fist out of a thick, flattened green oval. I cut slits into it to mimic the fingers, and rolled them in as if making a fist. I then used a veining tool and created the creases around the knuckles. Individual brick pieces were then cut and attached around the fist to simulate Hulk breaking through the wall. The very top of the cake was covered with a bright blue and then a layer of yellow. I made several small cuts into the yellow layer only and folded it back to look like shredded fabric. The signature Wolverine claws were shaped out of gumpaste, and left to dry a week prior to baking this cake. Using an air brush, I covered the claws in a edible metallic silver sheen, and created darker shadows with a slate blue. These were then inserted into the cake in the three areas once the color had dried. Doesn't it look like Wolverine clawing his way out?!
Sweet Lamb Cake
There is nothing cuter in this world than a baby lamb cake. Except for a pink ombre, baby lamb cake! The gradation of colors gave this simple and chic cake depth, and leads your eyes up the tall cake to where the little guy sits. I mixed three different shades of pink, covering the bottom cake in the darkest, and the lightest on top. All three cakes were stacked to created an overall height of 12 inches. Each cake was then accented with molded fondant lace that I covered with gold luster dust. With same medium shade, I cut out the message for the second tier to not break up the ombre effect. I then piped little swiss dots on the rest of the cake. The cake was so pretty, but no baby shower cake can be complete without an extra dose of cuteness. The star of cake was the fondant lamb and gumpaste balloon topper... this has got to the most adorable thing I've made so far! She was shaped out of two balls of fondant... the body was an oval and the head was more of a teardrop. For the fleece, I used a large round tip and made overlapping impressions all over the body. This method was simple and very effective. I used the same method for the small cap of fleece on her head, and accented it with a small pink flower. The ears were small teardrops of fondant, while the eyes were small black sugar pearls. I used a veining tool for her nose and mouth, and completed the look with a touch of pink luster dust for some rosiness. What do you think?!
Iron Man Arc Reactor Cake
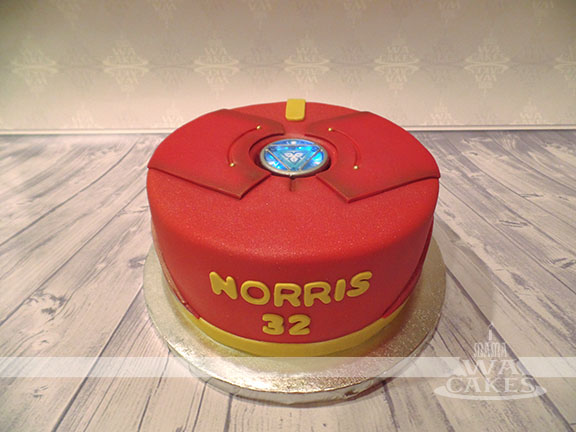
This cake was made for my awesome hairstylist, Norris. He has been perfecting my son's hair and of myself for the past 3 years, and when he mentioned his birthday... I couldn't help myself :) He mentioned a few times that he liked Iron Man so I thought that was a good place to start. He didn't want anything too complicated or too big, but I didn't want to give him anything too boring. I narrowed it down to making a cake based on the Arc Reactor in his chest... again, nothing boring. I then turned to the internet to hunt down the wow factor, something I could use as the light in his chest. I almost gave up when every thing I found was too big for my purpose or just required lots of mechanical work. Then I stumbled across a listing... a Arc Reactor USB flash drive with LED lights! It was perfect and all I had to do was to created an indent on top of the cake for it to sit in. I baked a two layer 8 inch cake, and covered it with red fondant. Using images I found online, I created a template for the chest details, and some detailing from the sides of his torso. I added on yellow fondant accents that I brushed with gold luster dust for a nice sheen. Once all the details were attached, I went back and airbrushed the edges with some copper to give some depth, and the overall cake with a nice metallic sheen. The final touch was the LED flash drive that I tightly in plastic wrap. All I had to do was turn it on, and the light show began! You can check it out below!
Thanks everyone for checking out this lengthy post, and I know I might have left out some details... please feel free to ask questions if you want to know how I did something. I hope you enjoyed these!
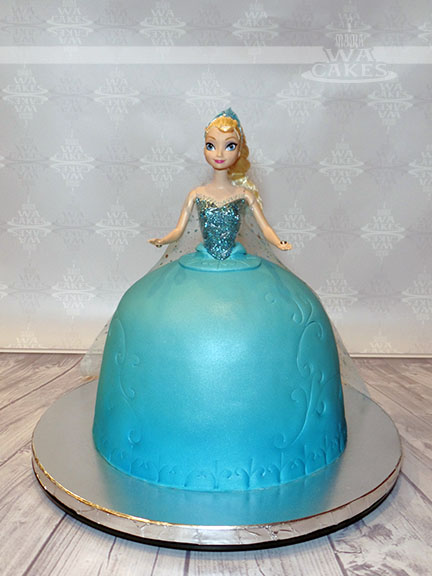
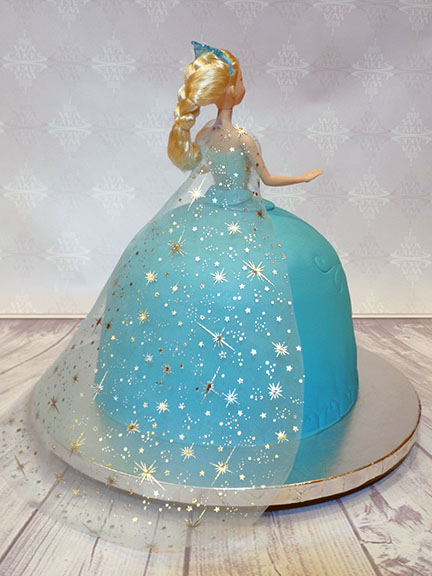
Disney Frozen Elsa Princess Cake
December 1, 2014
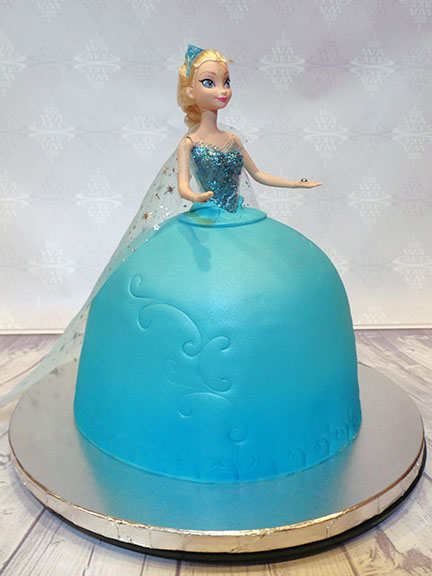
This following cake was a first for me... I've never had the opportunity to make a princess dress cake for anyone before. What better than make my first one as Elsa from Disney's Frozen! The first step was to figure out how tall the doll was and how big the cake would have to be to feed the expected number of guests. After much research, I came across the Disney Frozen Musical Magic Elsa doll. She was the perfect height for an 7" in tall cake.

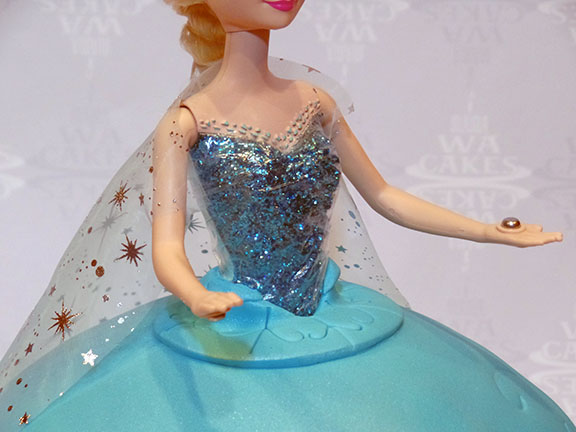
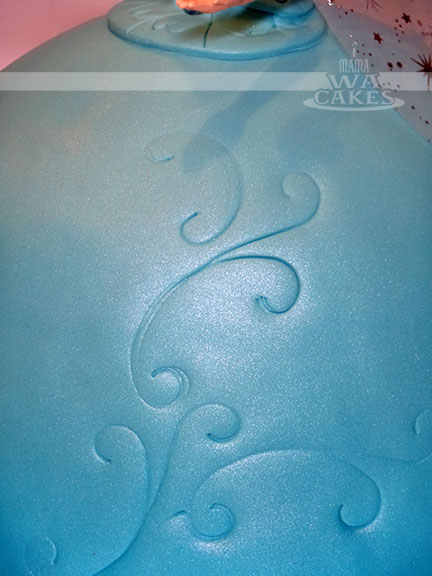 Elsa was then carefully placed into the cake, and I finished off the opening. I then stamped the cake with various Wilton decoration stencils to create a swirled motif along the bottom, and flowing up the sides. Be careful when doing this to not break through the fondant. Since Elsa's dress has an icy gradation, I air brushed the entire dress area in a pearl sheen, and blending in a darker blue sheen towards the bottom of her dress. For her cape, I opted for a printed mesh fabric that matched perfectly, color and motif. I made sure the sparkles were not simply glued on... Who wants glitter all over there cake?! oh, and I washed it prior to cutting out the desired shape. I simply cut two arm holes near the tapered top and slipped her arms through it. The finished look was perfect!
Did I mention she lights up?!!! You can view the cake in action here!
Cute Piggy Cake
October 29, 2014
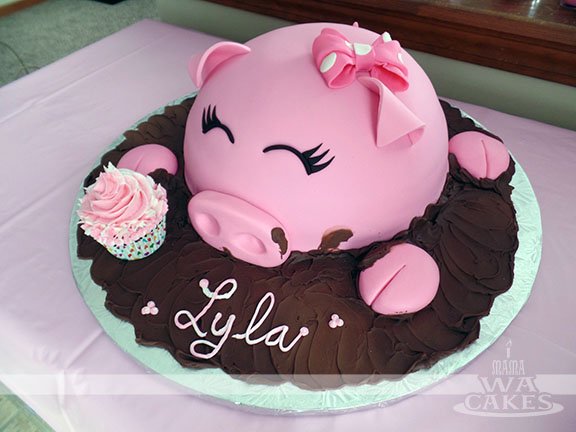
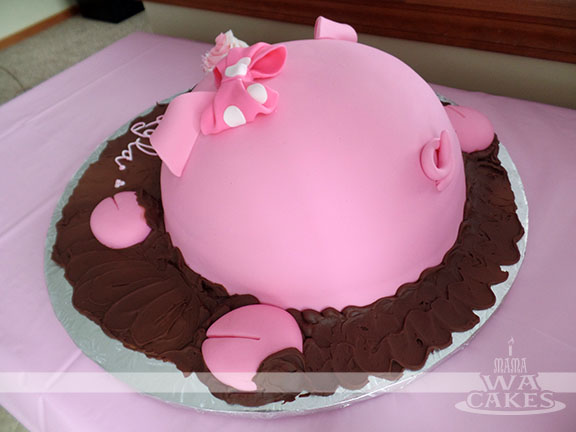
Last month, I had the pleasure of creating an adorable cake for my sister's friend... It was her little girl's 1st birthday! When she told me what she wanted, I was excited and quickly began brain storming.
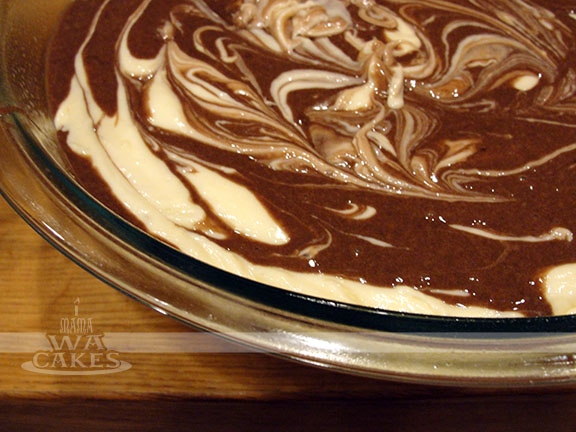

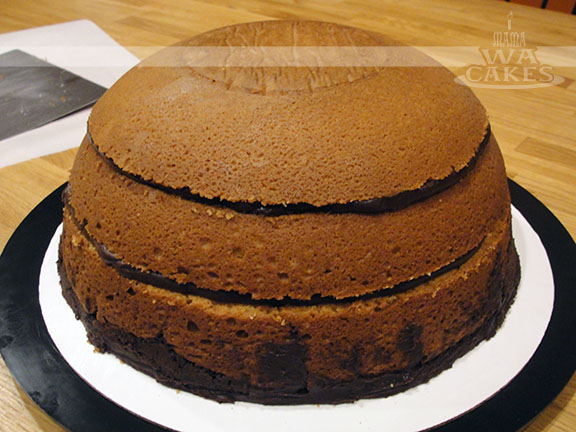
After the cake is baked and cooled completely, I leveled and torted the cake into 3 layers. To level a cake like this, the easiest way is to run a knife long the top of the bowl and keeping it straight until cut completely through. The layers were then filled with strawberry preserve, and crumb coated with buttercream. A blanket of pink fondant was then draped over the cake, and smoothed out by hand. For the distinct piggy nose, I created a large rectangle with rounded corners and indented the nostrils with a large ball tool. I then attached it to the cake with the help of some piping gel. I prefer to use piping gel or royal icing for large pieces like this, instead of water, for the holding power. The same goes for the piggy feet that I simply shaped out of balls of pink fondant.


Soul Togetherness Cake
August 15, 2014

A while back, I was asked by a friend if I could make a birthday cake for her fellow 45 vinyl enthusiast, Kevin. Kevin has recently introduced Soul Togetherness to Chicago, a weekend festival that brought in an international cast of DJs, and collectors of rare obscure American soul music, all on original 45rpm vinyl. His birthday coincided with the festival, so naturally, she asked that the cake resemble their logo... no problem!
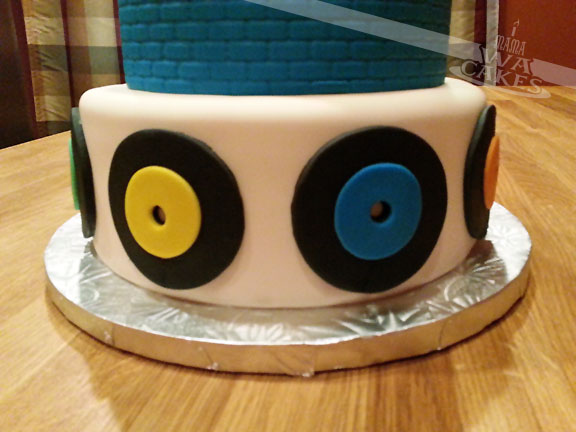
The cake started out with two 8" rounds and 2 6" rounds of spiced chocolate cake. These were torted and filled with a rich, buttery cinnamon buttercream. There is something magical about that combination of sweet and heat. The top tier was covered in fondant panels that I imprinted with a brick pattern, and covered the top with a circle of fondant with the same imprints. The bottom tier was covered in white fondant, and accented with mini 45s that I had cut out using round cookie cutters and icing tips.

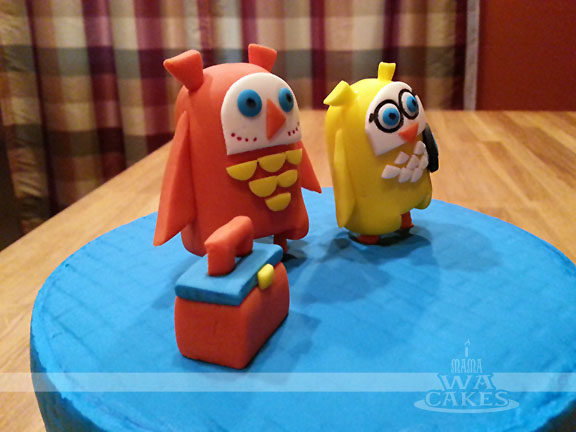
The cake was then topped off with sugar figures of the owls and record box that I had made a day ahead. The owls' bodies were shaped by making flattened logs, with one end rounded. The other end was cut with a knife to create the legs and lower half. Skewers were used for the legs, and covered in a thin sheet of fondant. I left the skewers long so I could insert the owls into the cake. The wings and ears were cut and attached with a touch of water. A tip for details like these is to poke or create an indent for the piece to sit into with a veining tool. I then carefully ( and tediously ) added the eyes and chest details. Small details such as the pupils, freckles, and glasses rim were drawn on with edible markers. Looking at the poster, I think I did pretty well! What do you think?


Riley's Pink Minnie Mouse Cake
June 23, 2014
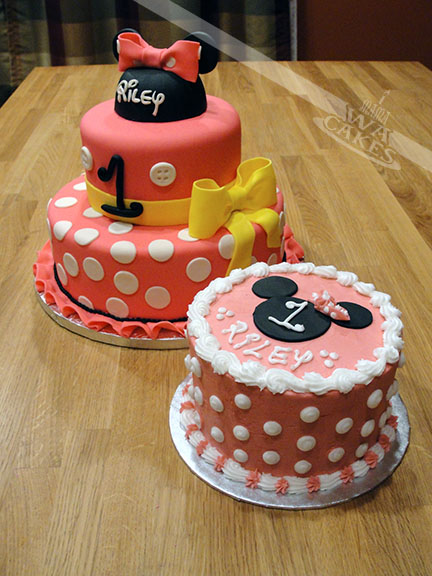
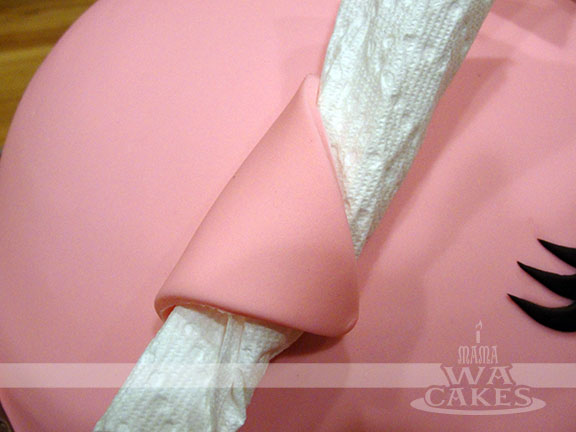
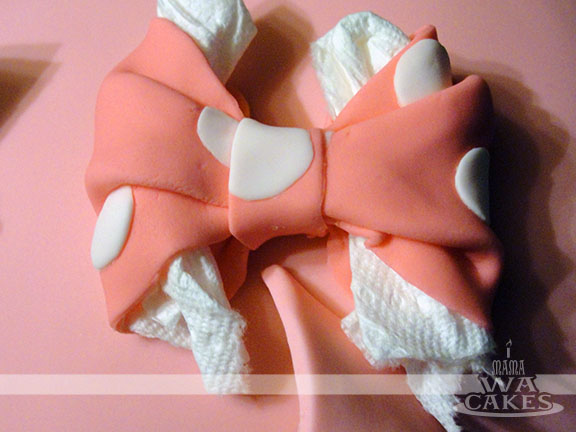
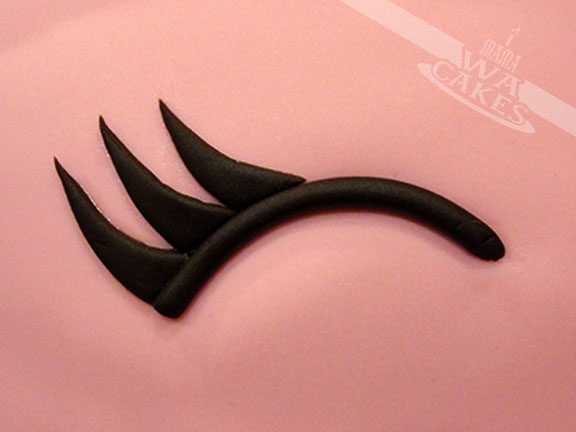
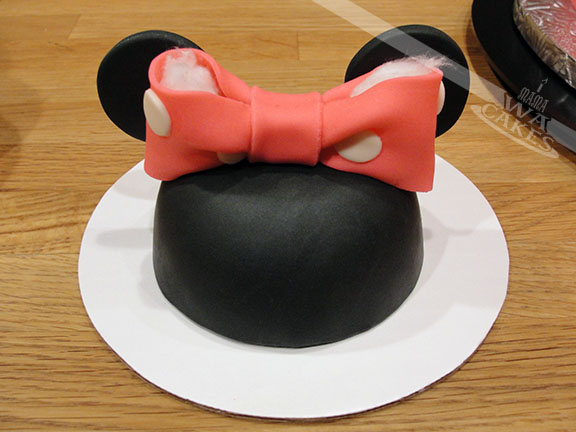
To start, I created the signature mouse hat by covering a small spice bowl with black fondant that I had added tylose to. A pinch of this powder will allow the fondant to dry like gumpaste. This is a great tool to have when working with dark colors... no need for mixing the color when there is ready made fondant! I allowed that to dry completely before carefully removing the hat part from the bowl. A great is to cover the outside of the bowl with cornstarch or powder sugar so the fondant won't stick. I then added the ears and a pretty pink bow. To give the bow a nice full shape, I stuffed a bit of tissue inside the loops and left them until they dried completely. The same method was also used to create the yellow accent bow on the cake. I rolled out a long wide strip of fondant and pinch the center, folded in the loops and pinched again to meet at the center. A narrow strip then was wrapped around the center to finish the bow. Once again, I left the tissue in the loops until it dried to give it fullness.

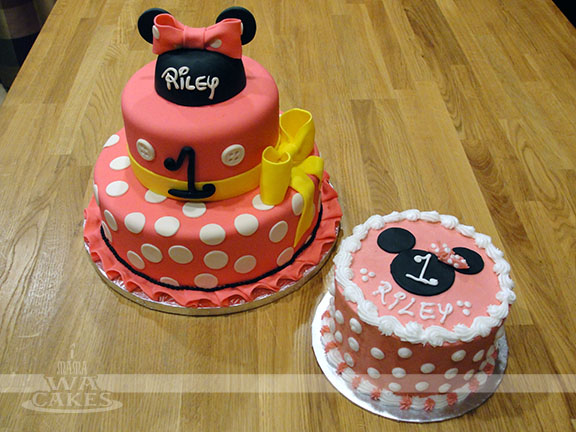
And on to the main cake! I started with a 10 inch cake that had a layer of yellow, and a layer of rich chocolate cake. The layers were torted and filled with a sweet and tangy strawberry cream cheese filling. The top 6 inch cake were two layers of chocolate nestled around a cloud of decadent coconut flakes and cream. The two cakes were crumb coated before they received a blanket of smooth pink fondant. To stack the the two cakes, I figured out the center of my cakes and measured the height of my base cake. I cut bubble straws to the proper height, and carefully inserted them half way into the cake. This is a trick I used to keep my cakes clean, and gives me time to adjust my placement if need be. I pipe a dollop of buttercream at the top of the straws, and align my top cake. I carefully release the cake, and allow it's weight to lower itself on to the base cake. This works great with buttercream cakes too! No buttercream covered fingers or gouged tops.


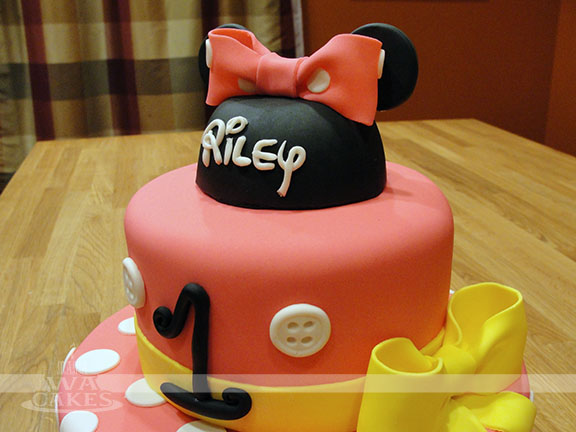 Once the cakes were stacked, I added a ribbon of yellow around the bottom of the 6 inch, and a random pattern of white polka dots were attached with a little water. The yellow bow was then attached off center, with a flow of ribbon sitting below it. The Minnie Mouse hat was then attached to the top with a bit of clear piping gel. Be careful when doing this because piping gel will dry shiny. For the finishing touches, I hand shaped Riley's name in the signature Walt Disney font and added it to the hat. I was extremely happy with how the font turned out, being a type freak and all :) I then molded two white buttons to resemble those Minnie's dress, and a whimsical number 1 for the birthday girl.
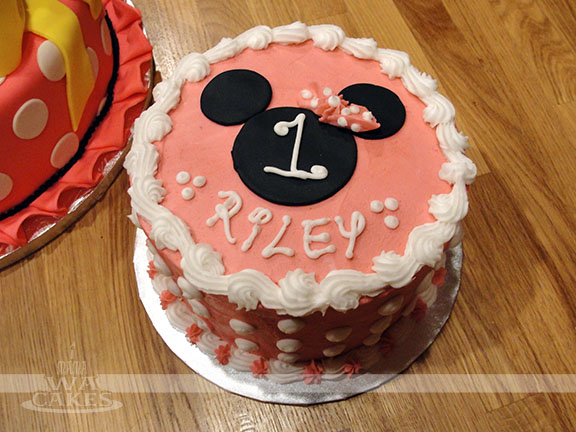
The smash cake designed with the same visual elements in mind to tie it all together. I started with a 6 inch vanilla cake filled with vanilla buttercream. The small stack of goodness was then covered in pink buttercream, and decorated with white polk dots and shell borders. I then cut out the mouse silhouette out of black fondant, and piped a pink and white polka dot bow to match the topper of the main cake. To make it complete, I piped the same whimsical number 1, and her name in white buttercream. Happy Birthday Riley!!!!


Buff Monster Birthday Cake
March 18, 2014
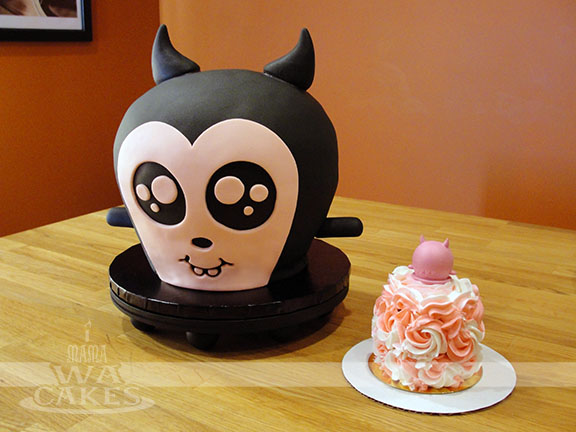
Last year, I was happily blessed with my daughter, Eva. She has been a wonderful addition to our family, and we couldn't ask for anything more. Well, except Mateo... I think he secretly wants a brother, but Eva's giving him a run for it. I can't believe a year has passed by so quickly, and it was time for her first birthday. Of course, I had to plan something fun and design a cake to match. I went online looking for some inspiration and I came across winter themes, then Valentine's Day... then I saw it! I found the cutest Valentine's Day edition Buff Monster ever!. A side note about myself, I love designer toys and vinyls... I mean LOVE. This was right up my alley, and was reminiscent of Mateo's first Dunny cake. I knew exactly what I had to do, and started planning the party.
Like all of my carved cakes, I started with a nice template to guide me on how much I needed to bake or carve away. Luckily for me, I had plenty of Ice Cream Minis on hand to reference. I stacked a 8" round on the bottom, two 9" cakes in the middle, and another 8" on top.

 Once the 4 cake layers were baked and cooled, I leveled and filled the bottom two layers. I then added support straws into the bottom half, and then placed a 7" cake board on top of the stacked cake. I then stacked the other 9" cake and 8" cake on top of the 7" cake board.
With all my layers stacked, I slowly started carving away at my cake. I used my template as my guide, sitting at eye level, and rotating the cake inch by inch. My advise for cake carving is to use a really sharp knife, carve away small sections, a chilled cake carves easier, and don't be afraid! Once I got the cake to a shape I was happy with (I carved too much away from the very bottom), a crumb coat was smoothed on before I laid on a blanket of black fondant.
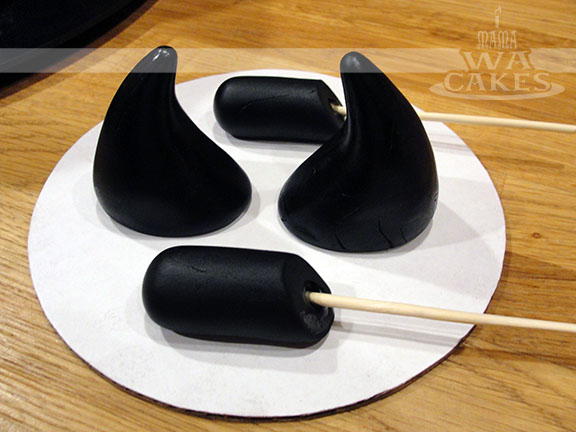 Using the template, I cut out and applied the pink fondant accents to
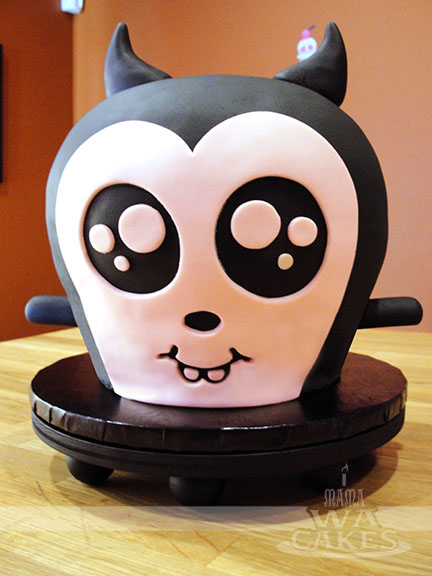
 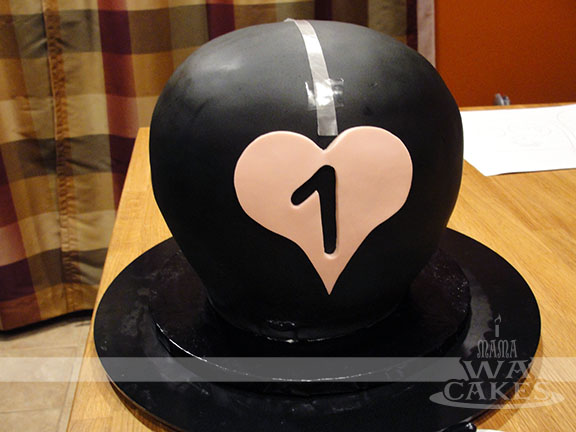 the front and back of the cake before adding the horns and arms that where shaped of out of a 50/50 fondant and gumpaste mixture. I tend to have an issue with aligning the front and back, side to side, placing decorations evenly. A trick I came up with is to use long strips of wax paper and taping it to the cake... scotch tape is food safe! This has helped me immensely to avoid lopsided arms and ears. To complete this cake, it was placed on a custom cake stand made of wood and round drawer knobs that the guys at work helped me put together :) A proper Buff Monster needs its signature round feet.
 For Eva's smash cake, I went with a 3" cake decorated in two toned buttercream rosettes. Buttercream rosettes are so easy to do, and they look wonderful for different occasions. I also figured buttercream would be easier for her to eat or dig her hands into, and in her case, put her face into. Happy Birthday to my little monster!

Pierson's Mickey Mouse Cake
July 19, 2013
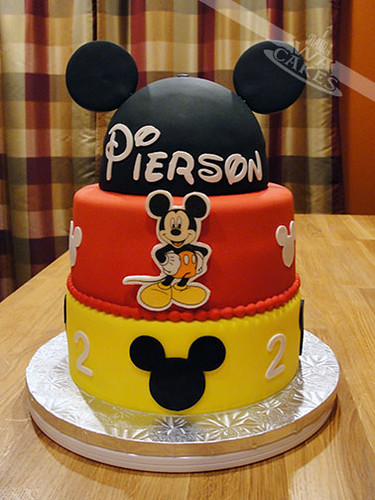
I wanted the cake to represent Mickey Mouse without looking exactly like him. The colors were ordered to copy the colors on the cheerful guy - Yellow (shoes), Red (shorts), and Black (ears). Get it? You got it!
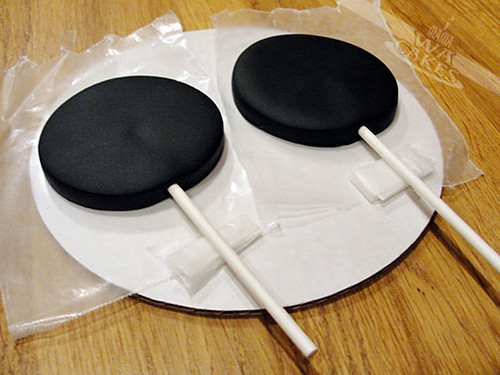
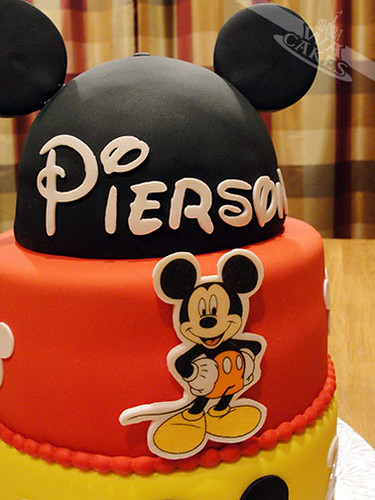 The cake itself was as yummy as it looks! I started with two 9 inch layers, and two 8 inch layers of rich chocolate cake. These were then filled with a toasty, gooey coconut filling. I love these two flavors together, Yum! The Mickey hat was also the same flavor, but was baked in half of a Wilton Sports Ball Pan. All the layers were then covered in fondant and stacked, making sure that they level and straight. Fondant decorations were then cut out to embellish the sides of the bottom two cakes. Pierson's name was cut out in the same style as the Disney's logo, of course. It's starting to look like a hat I once owned when I was young. For final touches, I attached the edible plaque to the cake with some melted candy coating, and carefully inserted the ears into the hat part, making sure they were even. The finished cake almost had me singing, "M-I-C-K-E-Y, M-O-U-S-E!"
Subscribe to:
Posts (Atom)


Social Icons