
Welker Square Offset Wedding Cake
September 26, 2013
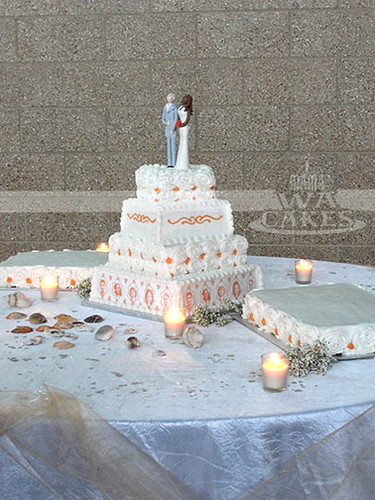
Last month, I had the opportunity to create a wonderful and meaningful cake for my co-worker and his fiancée. The cake was simple, yet elegant, with a touch of fun. When it came down to the decoration, I had free reign as long as the cake was offset and that their children were incorporated in the design. The offset cake symbolized their journey together, and their children were, of course, an important part of their lives. They were two individual families that will be joined as one on that special day.
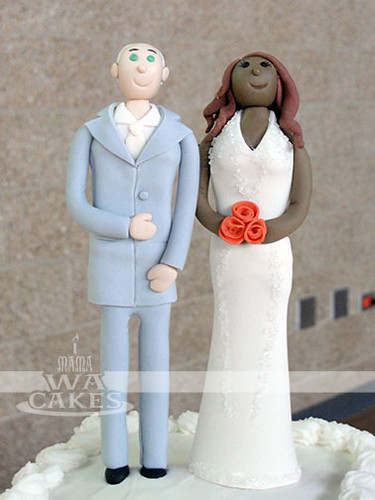
 Toppers done, and it's time for the cake... lots of cake. The cake was made up of 4 offset square tiers, rotated to the left until the corners almost met the edge of the one below. Each tier consisted of one layer of chocolate and one layer of vanilla cake, sandwiched around a layer of rich buttercream. These were then all iced in buttercream, alternating a smooth finish with one covered in large roses. I love covering whole cakes in large buttercream star tip roses. It is a simple technique that looks so dramatic. To incorporate the kids into the design, but keeping with the elegance of the cake, I created printed edible images of the kids in the coral accent color. I edited the images in Photoshop to remove the background, and then laid them out in Illustrator with decorative borders to compliment the overall design of the cake. I wanted their images to be part of the cake, not take away from elegance, or take away from the toppers. The edible images were attached to the buttercream on the bottom tier before it crusted over. I then pipes scallops along the edges. I finished off the cake with dots of coral in between the roses, and a simple scroll to tie in their wedding colors. The same treatment was duplicated on two sheet cakes that I also baked for extra servings. That is a great way to feed a large number of guest without having to pay for a super huge wedding cake.
Congrats to the S and N!

Mexican Concha (Shell) Recipe
September 13, 2013
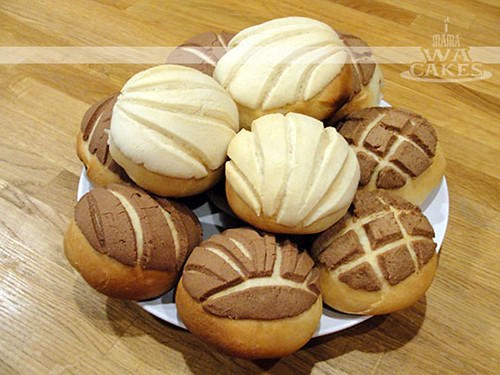
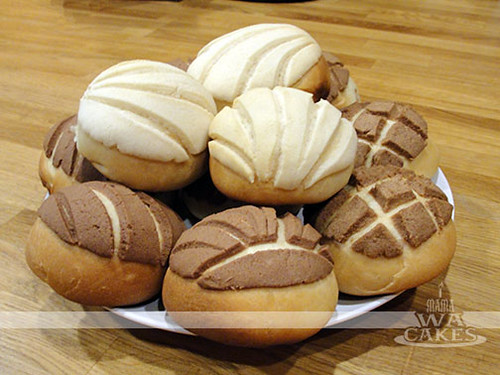
Whenever I walk into a panaderia, the warm inviting smell of cinnamon and sugar always lead me to these buns. They are warm and soft, pillowy and comforting. Yes, comforting. When the sugary topping dissolves on the taste buds, and instantly a smile comes across my face. And with that smile, I decided to try my hand at these delicious shells. Baking bread is definitely different from baking cakes... you have to let it grow ( or rise in this case ) and knead it with love. I was so proud of my first batch of Conchas that I decided to share this with you. Please let me know what you think. Enjoy!
Ingredients
- 3 teaspoons active dry yeast
- 1/2 cup warm water ( 105 degrees F to 115 degrees F or 40 to 46 celsius)
- 1/2 cup lukewarm milk ( scalded, then cooled)
- 1/3 cup granulated sugar
- 1/3 cup butter, softened
- 1 teaspoon salt
- 1 egg
- 3 1/2-4 cups all-purpose flour
- 1/3 cup granulated sugar
- 1/4 cup butter or 1/4 cup margarine
- 1/2 cup all-purpose flour
- 1 teaspoon ground cinnamon
- 1/4 teaspoon vanilla extract
- 1 1/2 teaspoons orange zest
Flavored Topping Dough
Directions
1. Dissolve yeast in warm water in large bowl.
2. Stir in milk, sugar, butter, salt, egg and 2 cups of the flour.
3. Mix until smooth.
4. Stir in enough remaining flour to make dough easy to handle.
5. Turn onto a lightly floured surface.
6. Knead until smooth and elastic, about 5 minutes.
7. Place in a large greased bowl, then turn greased side up.
8. Cover and let rise in a warm place until double, about 1 1/2 hours. (Tip: The longer you let it rise, the soft the bread.) While this is rising, prepare Flavored Topping Dough.
9. The dough is ready if it leaves an indentation when touched.
2. Stir in milk, sugar, butter, salt, egg and 2 cups of the flour.
3. Mix until smooth.
4. Stir in enough remaining flour to make dough easy to handle.
5. Turn onto a lightly floured surface.
6. Knead until smooth and elastic, about 5 minutes.
7. Place in a large greased bowl, then turn greased side up.
8. Cover and let rise in a warm place until double, about 1 1/2 hours. (Tip: The longer you let it rise, the soft the bread.) While this is rising, prepare Flavored Topping Dough.
9. The dough is ready if it leaves an indentation when touched.
10. Punch dough down; divide into 12 equal pieces. Shape each piece into a ball; place on greased cookie sheet.
11. Divide the three flavored dough into 4 equal pieces.
12. Pat each piece into a 3-inch circle. Place 1 circle of Topping Dough on each ball of bread dough, shaping it down over the ball.
13. Make 5 or 6 cuts across the topping, using a table knife, to form a shell pattern.
14. Cover and let rise until double — about 40 minutes.
11. Divide the three flavored dough into 4 equal pieces.
12. Pat each piece into a 3-inch circle. Place 1 circle of Topping Dough on each ball of bread dough, shaping it down over the ball.
13. Make 5 or 6 cuts across the topping, using a table knife, to form a shell pattern.
14. Cover and let rise until double — about 40 minutes.
Heat oven to 375 degrees F (190 celsius). Bake buns until golden brown, about 20 minutes.
Flavored Topping Dough
1. Beat sugar and margarine until light and fluffy.
2. Stir in flour until mixture is the consistency of thick paste.
3. Divide into 3 equal parts.
4. Stir cinnamon into one part, vanilla extract into one part and orange peel into one part.
2. Stir in flour until mixture is the consistency of thick paste.
3. Divide into 3 equal parts.
4. Stir cinnamon into one part, vanilla extract into one part and orange peel into one part.
Pierson's Mickey Mouse Cake
July 19, 2013
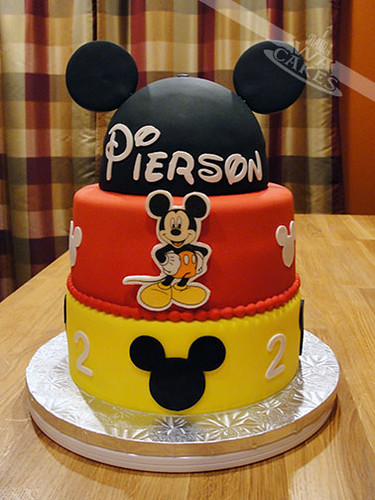
I wanted the cake to represent Mickey Mouse without looking exactly like him. The colors were ordered to copy the colors on the cheerful guy - Yellow (shoes), Red (shorts), and Black (ears). Get it? You got it!
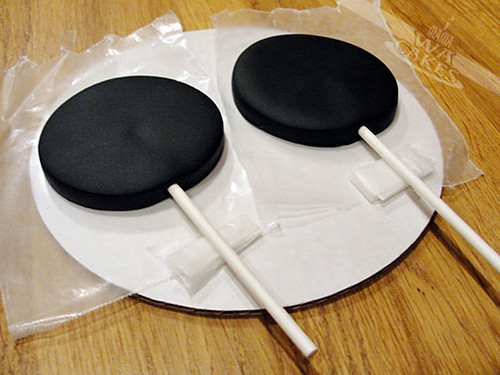
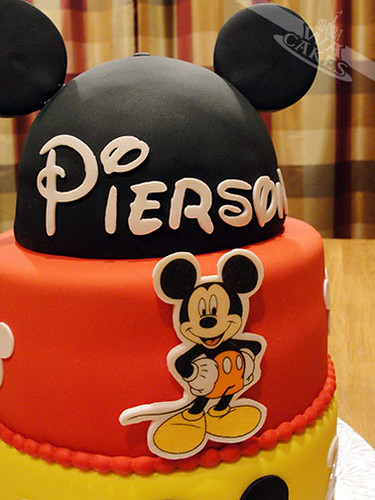 The cake itself was as yummy as it looks! I started with two 9 inch layers, and two 8 inch layers of rich chocolate cake. These were then filled with a toasty, gooey coconut filling. I love these two flavors together, Yum! The Mickey hat was also the same flavor, but was baked in half of a Wilton Sports Ball Pan. All the layers were then covered in fondant and stacked, making sure that they level and straight. Fondant decorations were then cut out to embellish the sides of the bottom two cakes. Pierson's name was cut out in the same style as the Disney's logo, of course. It's starting to look like a hat I once owned when I was young. For final touches, I attached the edible plaque to the cake with some melted candy coating, and carefully inserted the ears into the hat part, making sure they were even. The finished cake almost had me singing, "M-I-C-K-E-Y, M-O-U-S-E!"
Stephanie's Chevron Bridal Shower Cake
July 17, 2013
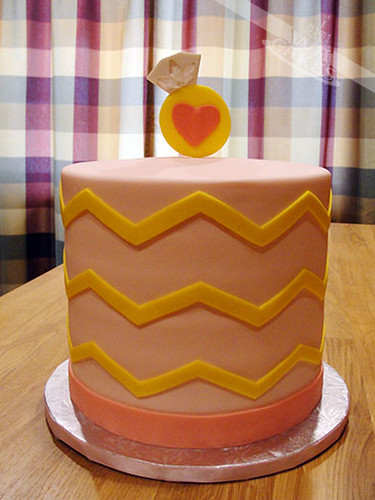
 This tall cake is made of alternating layers of chocolate and strawberry cake filled with strawberry preserve. I wish I had a photo of the served cake just so you could what the layers looked like. Whenever a cake is so tall, I like to separate the cake in half with a hidden cake board that is trimmed slightly smaller than the diameter of the cake. Boba straws were inserted into the bottom half to support the weight of the top half. I find that Boba straws are easier to use and cut than wooden cake dowels. This trick makes the cake stable and easier to serve, because cutting an 8" tall slice of cake can be a bit tricky and messy. I made an illustration of the cake construction so you can see what I did. I hope that helps!
All the layers were then crumb coated in buttercream, with some piped into space around the middle to hide the cake board. The cake was then covered in a blanket of soft pale pink, and the bottom edge was finished with a darker pink ribbon of fondant. Now, here comes the fun part...Chevrons!!! For the chevrons, I measured the circumference of my cake after I covered it with fondant. I then used that number and created my chevron template to cut out them out with, but this is where the wax paper method comes into play. Instead of just cutting out long strips of the chevron and painstakingly trying to align them on the cake, I cut them out on a long sheet of wax paper that is the height and length of my cake. The cut fondant sticks to the wax paper in the same positions as if they were on my cake. I then transfer the chevrons onto my cake by aligning the wax paper with my cake and wrapping it around and meeting up at only one seam. Tada!

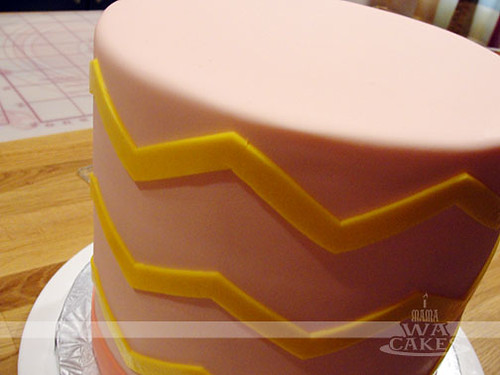
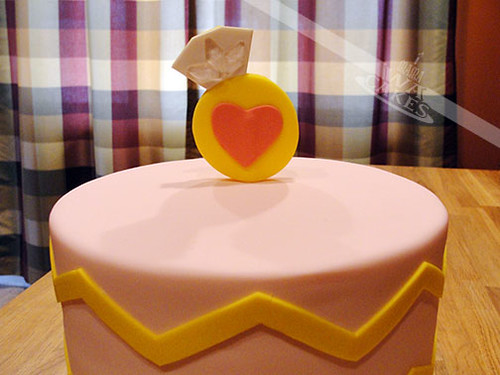 Not that the cake wasn't pretty with just the chevrons, but I just had to make a ring topper that had some sugar diamonds on it. No wedding ring is complete without any type of bling on it :) I made this by hand cutting out two layers of the ring shape, and sandwiching a popsicle stick in between. I then cut out a heart for front and a white layer for the diamond. With some sugar glue, I attached the three sugar diamonds to the white diamond area. This was definitely a fun and pretty cake for such a special event. Congrats Stephanie!
Subscribe to:
Posts (Atom)


Social Icons