A season of cakes!
December 12, 2012
With the holidays coming, and bun baking in the oven... I realized that I haven't done an update forever! So, please forgive me for not going into detail as I normally do. This posting will be more of a listing of my busy cake season, but do ask me questions if you do have any :)
Bubble Guppies Birthday Cake for Olivia
Stacked vanilla cake with buttercream filling, adorned with edible plaques and fondant decorations.
Graduation Book Cake for Amy
Red Velvet cake with buttercream filling, decorated with fondant and silver luster dust.
Yo Gabba Gabba Cake for Pierson
Stacked Chocolate with Chocolate Bavarian Cream, Vanilla with Butercream, and Green Tea cake filled with Raspberry Preserve.
Queen of Hearts Bridal Shower Cake for Angela P.
Red Velvet cake with Cream cheese filling, topped with edible image to match invitation.
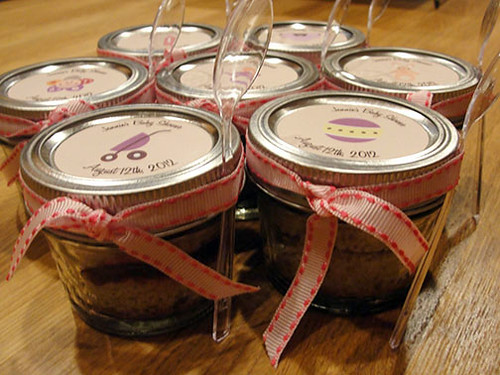
Baby Shower Cake Jar Favors for Jennie
Green Tea Cake layers nestled between raspberry preserve in mason jars.
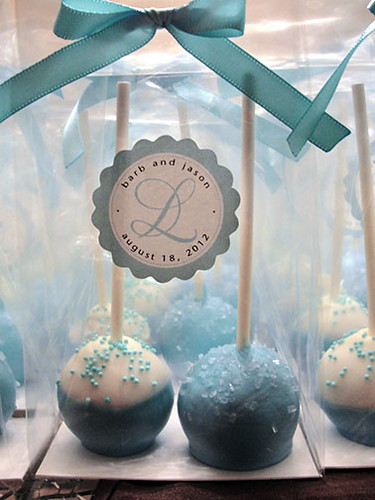
Wedding Cake Pop Favors for Barbara and Jason
Red Velvet and Chocolate Cake Pops covered in "Tiffany" blue and white candy coating, accented with nonpareils and sprinkles.
Bridal Shower Cake for Eumi
Butter Pound cake filled with fruit and bavarian cream, decorated in whipped cream petal technique. Custom edible plaque made to match invitation.
Ombre Petal Cake Variations
July 6, 2012
The end of May means the beginning of summer, warmer days, relaxing, and the birthdays of two of my fave ladies. . . My sister, Linda, and my mom! I love making their cakes. It's the gratification I get when they first see their cakes, the praise when they taste them, and the free creative control I have with them.
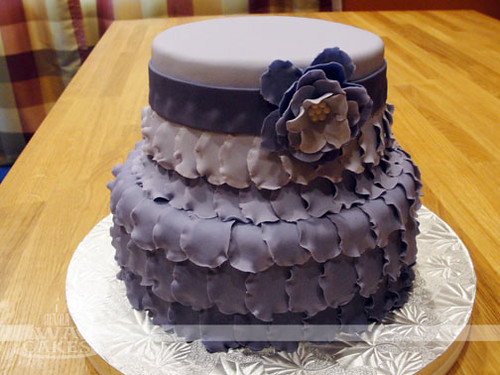
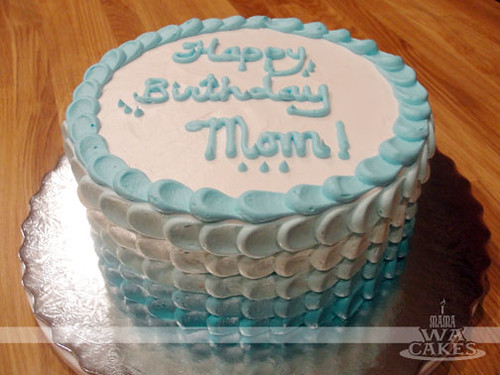
This year, I was inspired to try out two very different petal cake techniques. A fondant rose petal version for my sister, and a whipped icing version for my mother. I've always wanted to try out an ombre color scheme on a cake, so why not with these too? My sister's was of course a gradation of purple tones, and a softer blue for my mom.
For the fondant petal cake, I stacked and covered the cakes in a light purple. I then rolled out a dark shade of purple and cut out the petal shapes. On top of a thin foam, I used a ball tool to ruffle the petal edges for movement. These were attached to cake as I completed each one, slightly overlapping the previous petal. I worked my way around the cake until I completed a row. The next was a slightly light shade. I repeated the same technique of ruffling the edges and attaching to the cake, but also overlapping the row below. I continued this until half of the top cake was covered in the lightest shade of purple. I finished the cake with a dark purple ribbon of fondant, and a beautiful flower in all the shades.
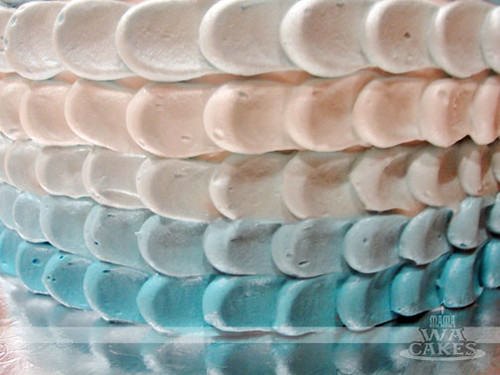
For the whipped icing version, I torted and filled 4 layers of french vanilla cake with bavarian cream with fresh slices of nectarines. My mom loves fruit in her cakes :) I then iced the entire cake in stabilized whipped icing, making sure to get the top as smooth as possible. The sides aren't as crucial since the petals will cover it. I divided the remaining whipped icing and tinted 4 shades of a sky blue. Using a #12 tip, I piped on dots of each color in a single column with the darkest at the bottom. I then carefully swiped down half of the dots with a small spatula, wiping it clean with each swipe. I then continued this process all the way around the cake, making sure to pipe the dot over the tail of the swiped areas. At the last column, I piped the dots without swiping them. I finished the top with same petal technique, and a message to my mom.
Happy Birthday ladies!
Brown Bear Birthday Cake and Treats
June 1, 2012
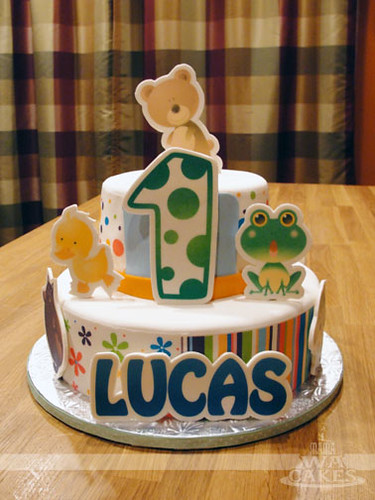
About the same time last year, a friend of my sister's called me about a jungle themed baby shower cake. I remember that cake like it was yesterday, and it still brings a smile to my face. This year, that baby is now turning 1 year old! Wendy called me about the big event for Lucas, and we went over the details... down to the cake stand she wanted to use. The idea behind the theme was inspired from the book, "Brown Bear, Brown Bear, What do you see?". Wendy felt that the illustrations from the book were not as inviting as she would like. So why not create a cuter version?! Using my background in graphic design, the cute little creatures on the cake were born and brought to life.
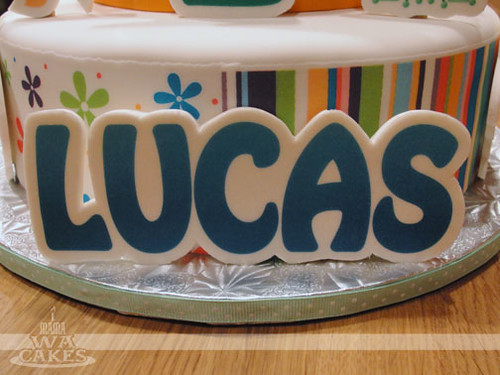
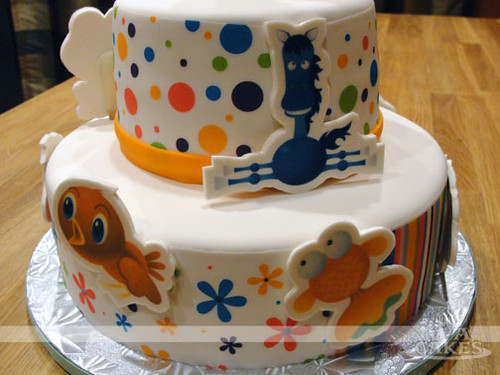
This cake was my first attempt at creating edible plaques and decorating a cake with edible images. I created custom animals in Illustrator and printed them out on edible wafer paper with edible ink. Please do not attempt to print on edible paper with any regular printer. They are not food safe, and we don't want anyone getting sick :( The images were then attached to a sheet of gumpaste that I rolled out 1/8 inch thick. I brushed on a thin even coat of clear piping gel to the back of the printed image, and then gently smoothed it onto the gumpaste. A tip for edible images is to not over wet the wafer paper or the printed image can bleed into the surrounding icing. With the aid of a sharp exacto knife and a steady hand, I cut out each of the cuties and allowed them to dry completely.
Wendy loved the last cake I made so much that we duplicated the flavors in this cake. The 10" bottom was a chocolate with chocolate bavarian cream, and the top 6" was a french vanilla with buttercream. The two cakes were crumb coated and blanketed in a smooth layer of white vanilla fondant. Once stacked, colorful and playful edible images were used to decorate the cake. I chose the Luck's Happy Tall Variety Designer Prints because they matched the setup pictures sent to me by Wendy. I dampened a clean paper towel and gently ran it along the sides of the cakes to attach the edible images. This moisten the fondant enough for proper adhesion without over-wetting the images. Carefully aligning the strips with the bottom edge of the cake, I wrapped the edible images around the cake and smoothed it down with my hands. Make sure you hands are dry when handling these, or you can run into some sticky situations, literally. The cute edible plaques were then attached to the cake with the help of some melted white candy coating. For two of the animals in the front and the brown bear on top, I dipped wooden popsicle sticks into the candy coating and attached them to the back of the plaques. This allows for a cleaner looking backside once they were inserted into the cake. Some people like to pipe on a glob of candy to secure the stick, but that looks too lumpy for me.
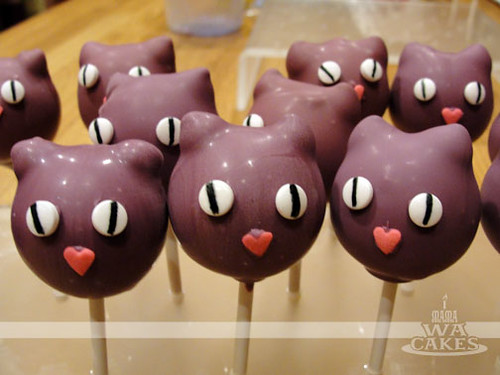
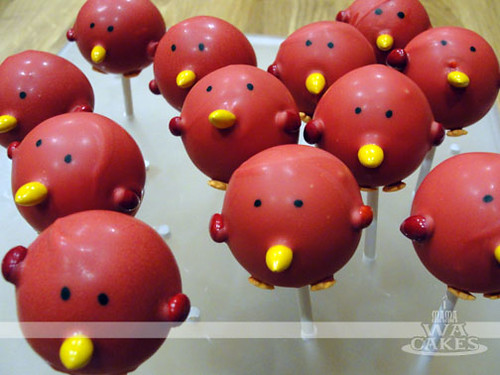
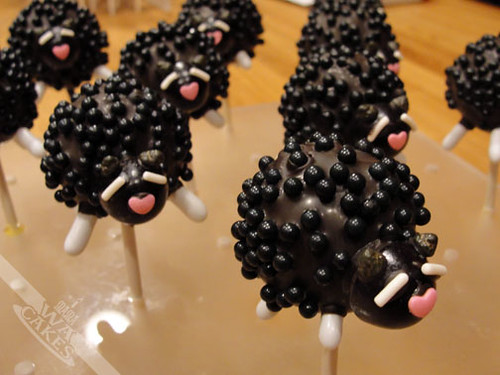
Oh, but the fun did not end there. In addition to the cake, Wendy wanted 5 dozen animal cake pops as centerpieces for the tables, and 2 dozen push cake pops as favors. To tell you the truth, I think the cake pops were harder than the cake itself. There was so much detail that went into these little guys. They just looked too cute to even eat! Starting with chocolate cake, I formed 1.25" balls of yummy goodness and chilled them in the fridge before working with them. I melted the five colors of candy coating and dipped each one and tapped off the excess before attaching the appropriate candy or nonpareil. The fun was being able to use different candies and be very creative with it. The green frogs had their candy necklace eyes, candied sunflower seeds made up the red birds' beaks, the brown bears got their M&M ears, chocolate chips for the purple cats, and the black sheep was covered in black candy pearls.
The push cake pops were a good surprise for the guests - young and the young at heart! The two chocolate mini cakes nestled between fluffy layers of green and blue buttercream are delicious and fun to eat! Just push them up and into your mouth! These bake up in a mini cupcake pan in about 15 minutes. Using a #1M tip, I dot a bit of buttercream inside the push up container to hold the first cake in place. A swirl of buttercream goes in between before the second cake, and a nice swirl tops it all off. Enjoy!
Pinwheel Princess Cake For Evelyn
April 23, 2012
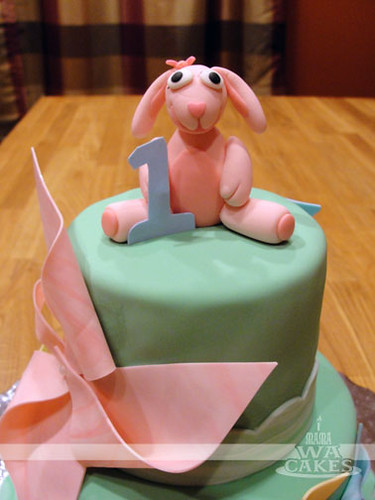
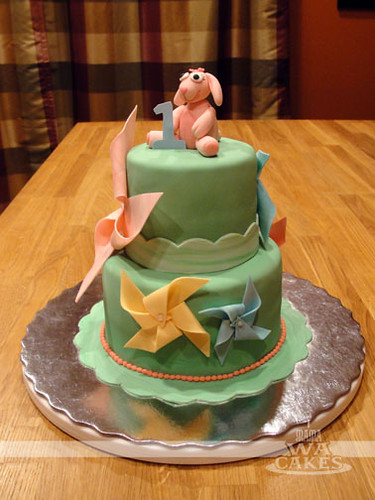
With the flowers blooming and trees budding, this mini two tier was the perfect intro to the lovely spring season. My friend messaged me about designing a pinwheel themed cake that was just for her daughter alone. It wasn't a simple smash cake, so I coined it as a princess cake. I guess a prince cake if it was for a boy :) The colors brought forth memories of spring, and the cute little bunny represented Evelyn. She was born under the Chinese zodiac of the rabbit, and a cute one she is.
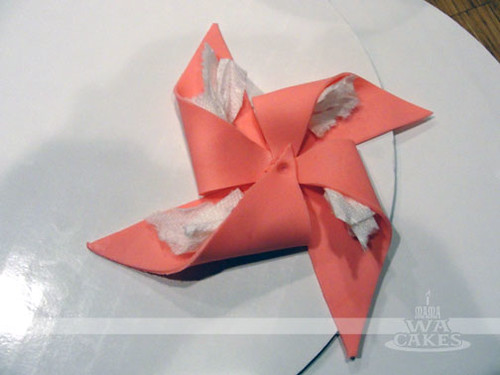
Before baking the cake, I modeled the little bunny of out a 50/50 mix of fondant and gumpaste. I shaped each part and allowed to them to dry before adding the details. Once the cute bunny was completed, I began to work on the pastel pinwheels. I rolled out thin sheets of fondant in various colors and then cut out different sized squares. I used a #1 decorating tip and marked the center of each one. Using a knife, I cut through the squares from each corner and stopping before I reach the center. I then folded over alternating corners to the center and attached them with some gum glue. If you need a template, you can find a simple one here. Tucking a bit of tissue in each fold gives it a bit of dimension. I allowed the pinwheels to dry completely before handling them. The last thing I wanted was for them to buckle in my hands since they were so delicate and thin.
The cake was a simple vanilla recipe filled with buttercream, and covered in a beautiful green fondant. I stacked the two cakes, and wrapped the top layer with a marbled green scalloped ribbon. For more visual impact, I also wrapped the same scalloped ribbon around the bottom layer on the cake board, and finished with tiny pink beading. The dried pinwheels were then arranged around the cake and attached with some clear piping gel. Be patient when doing this and hold each one in place for a few seconds to make sure they adhere. The last thing I wanted was to have one come crashing down on the table and shatter into pieces. :( I've learned that from experience. To finish the pinwheels, I attached a sugar pearl in the center of each one with a dab of piping gel. They looked perfect! Then comes the star of the party, the little bunny goes right on top with a number 1 for the birthday girl. This cake came out just as I hoped it would... sweet, cheerful, and alive with spring! Happy 1st Evelyn!
Subscribe to:
Posts (Atom)














Social Icons